Monthly Archives: October 2024

Choosing a Japanese Maple

We’re certain you’ve heard it numerous times: fall is the best time to buy your Japanese maple. Have you come into the garden center to pick one? Did the varieties overwhelm you? Let us make it easier for you by explaining Japanese maple differences. Then, when you come in, you’ll know exactly what you want.

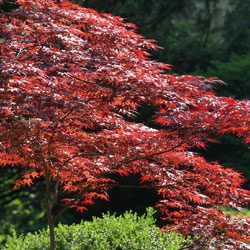
The species Japanese maple, Acer palmatum, moderately grows to a 20′ by 20′ multi-trunked tree. The leaves have 5-9 finely cut lobes giving them a more delicate look than other maples. Red spring leaves turn to green in the summer and blaze with yellow, orange and red in the fall. All do best with protection from drying winds and hot overhead afternoon sun. During their centuries of use in gardens around the world, gardeners have discovered and propagated those selections with unusual growth habits and bark patterns, as well as leaf color and shape. With hundreds of Japanese maple varieties available at garden centers, we feel a little simplification is in order.

  • Leaf Shape
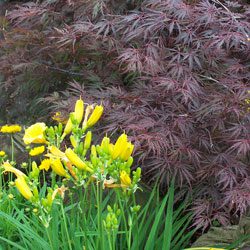
    The variation Dissectum or Laceleaf Japanese Maple has leaves are deeply cut and finely lobed giving a lace cutout look. These varieties generally grow best in shady locations as the leaves easily burn or scorch. The leaves of non-Dissectum varieties are much less lacy. They resemble the leaves of native maples but are smaller and more deeply cut.
  • Leaf Color
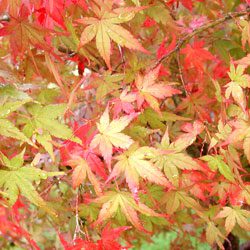
    The leaf color of different Japanese maples also varies. Many have red spring growth changing to green in the summer. However, some retain the red through the growing season. Some varieties have variegated leaves with white, cream, gold or pink. Variegated leaves burn easily in the sun but can revert to all green in too much shade. Green leaves tolerate more sun than red. Autumn is when Japanese maples really put on a show with a riot of blazing colors.
  • Tree Form
    Non-Dissectum varieties grow more quickly into upright forms. Some varieties remain less than 10′ tall but others can grow to 25′ tall by 20′ wide. Laceleaf maples slowly develop a weeping form approximately 8-10′ tall and 8-12′ wide. However, ‘Seiryu’ is an exception, growing into an upright form.

Laceleaf (Dissectum)

Non-Dissectum

Location

More shade

Less shade

Size

Smaller

10-25′ tall depending upon variety

Tree Form

Weeping

Upright

Leaf Shape

Lacy, fine cut

Lobed

Leaf Color

Red, green

Red, green, variegated

Now that you have identified a suitable planting location and the type of Japanese maple you prefer, come see us and let our friendly staff show you the varieties that meet your requirements. Autumn colors are blazing now so this is a great time to make your selection.
maple_choosing_4

maple_choosing_1

maple_choosing_3

Fall in Love with Fall Pansies

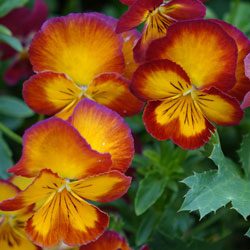
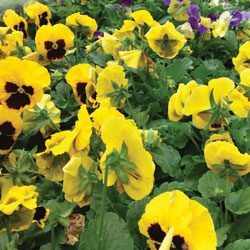
Ideal for fall gardens, pansies offer a colorful display for almost six months – in the fall when they are planted, in the winter during a stretch of sunny days and again in spring! Winter pansies may be planted anytime starting in mid-September and continuing through October. Multiple plantings spaced a week or two apart can also ensure even more blooms to enjoy throughout otherwise drab months.

Planting Pansies

As with any plant, pansies perform better if the soil that you place them in is well prepared. Choose a planting location that is well-drained and work in 4-6 inches of rich organic matter, such as garden compost, peat moss or Bumper Crop. Plant pansies at about the same level, or slightly higher, than they were growing in their market packs or containers, taking care not to plant too deep or the plants may wilt and rot and the roots could smother. After planting, mulch and water the bed thoroughly. Remember to check the plants often during the first three weeks after planting or until new growth begins, to ensure adequate moisture necessary for healthy growth. Because these plants require very little care, no other maintenance is usually necessary for them to reach their full potential.

Where to Plant Pansies

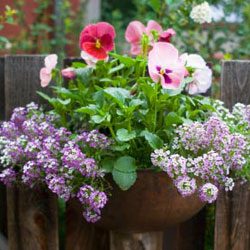
These versatile blooms can be used in many different parts of your garden or landscape. Add a graceful drift of single-colored pansies or a mass of mixed colors to brighten a border, under a tree or along a fence, pathway, deck or wall. Try tucking single plants in garden beds around perennials and shrubs that have finished blooming to brighten up an otherwise dreary section of the landscape and to help mask older, spent growth. Pansies also do well in containers placed on a deck or patio or next to the entrance of your home to greet your guests with welcoming color. Try pansies in a hanging basket and you can even move them indoors to enjoy when the weather is too poor for outdoor gardening. A small container of fall pansies can also be a great gift for winter holidays, birthdays or just to brighten the day of anyone who could use a touch of color in their life.

With so much color to enjoy in so many ways, fall and winter pansies should be a staple of any garden and will bring great gardening joy to the landscape even during colder, dreary months.

fall-pansies-1

fall-pansies-2

fall-pansies-3

Problems With Your Compost Pile? Fix Them!

A compost pile should be part of every gardener’s yard, since it adds so many benefits for recycling and providing organic material in the garden. There are times, however, when it can be tricky to keep a compost pile in peak condition and breaking down material most efficiently. If you encounter any of these common problems, you can easily correct them and keep your compost pile at its best.

  • Pile is Too Dry
    Without adequate moisture, beneficial microorganisms cease to function and decomposition stops, turning a compost pile into a clumpy mess that does not decay into usable organic material. Keep the pile moist at all times, but not overly wet. A dampness like a squeezed sponge is ideal. It may be necessary to use a hose to water your pile occasionally, or a tarp or piece of plastic over the top of the pile can help keep moisture in the pile instead of evaporating.
  • Foul Odor
    A stinky compost pile is no gardener’s friend, and over-watering the pile will compact the material. When air space is decreased, the pile becomes anaerobic, resulting in an unpleasant odor. Turn the pile frequently to increase aeration and add larger pieces of dry, porous, carbon-rich material such as wood chips or straw to absorb excess water and improve air circulation.
  • Pile is Cool
    Check all the items required for a hot, quickly-decomposing pile: carbon, nitrogen, air and water. Correct any deficiencies. Another issue may be that a pile that is too small will have difficulty insulating itself. Increase the size of your compost pile by adding more material so it can generate sufficient heat from decomposition to keep itself warm.
  • Pests in the Pile
    While insects and worms are welcome helpers in a compost pile, a poor pile may also be attracting mice, rats, squirrels, raccoons and other wildlife. This usually means that the wrong material was used for composting. Never add meat, fish, bones, dairy products or oily food to the compost pile, all of which can have strong odors that will attract unwanted wildlife. Similarly, no human, cat or dog manure should be added to the pile. Avoid adding weed plants or diseased plants as well, since those weed seeds or disease spores could be transmitted to your garden or landscape when the compost is spread.
  • Poor C/N Ratio
    When planning the optimum conditions for compost decomposition, the standard recommendation is 3-to-1; three parts carbon to one part nitrogen. Carbon-based material is brown and nitrogen-based material is usually, but not always, green. Chopping or shredding additions to the compost pile will speed up the decomposition and help keep the pile balanced.

The best materials to add to your compost pile include…

Brown Material (Carbon-Based)
– Dried, dead Leaves
– Shredded paper, including newspaper
– Wood ash
– Sawdust
– Eggshells
– Chipped brush and wood chips
– Straw and twigs

Green Material (Nitrogen)
– Grass clippings and sod scraps
– Vegetable and fruit peels, scraps and rinds
– Disease and insect-free plant material, such as clippings and prunings
– Horse, cow, chicken and rabbit manure (herbivores)
– Coffee grounds and used coffee filters
– Used tea bags
– Used potting soil

No matter what issues your compost pile may be having, problems are easy to correct and you can quickly adjust your pile to be productive and efficient. Before you know it, you’ll have plenty of rich, nutritious compost to nurture your garden and landscape all year long.

compost-1

compost-3

compost-2

Over-Wintering Container Plants Outdoors

All containerized plants that are considered hardy in your zone can spend the winter outdoors, but you do need to take a little special care to keep them safe and comfortable as temperatures drop. Despite their hardiness, winter is still a challenging season, but it is possible to keep your container plants healthy until the days grow longer and warmer again.

Options to Overwinter Your Container Plants

  • In the late summer or fall, removed the plant from its container and plant it in the ground while the soil is still warm. Another method is to bury the pot, with the plant in it, in the garden and remove the pot following spring. Both of these methods will help insulate the root system, preventing it from freezing solid and killing the root system.
  • Place containerized plants in an unheated garage but along a heated wall. This is an excellent method for very large pots or porous pots that tend to break apart from the constant cycle of freezing and thawing, and so would not be very hardy if buried. For extra root protection and insulation, wrap the pots in plastic bubble wrap or wrap an old comforter or quilt around the pots.
  • Group pots together along the sunny side of your house or shed. If this area is windy, create a windscreen with stakes and burlap. Place bales of straw or hay around the perimeter of the grouping up against the pots to further protect plants from cold winds. Fill in areas between pots with mulch, shredded leaves, grass clippings or hay for insulation. Lay evergreen branches or place a layer of mulch on top of the pots for additional protection.
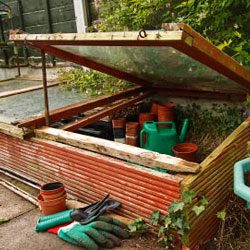
  • Use a cold frame covered with plastic or Reemay fabric to help control temperatures and reduce light as well, helping plants stay dormant in winter. It will still be necessary to use mulch, shredded leaves or hay around and in-between pots for insulation. Rodent control, such as Havahart traps, may be necessary when using this method.

Watering Container Plants in Winter

Make sure that plants go into the winter with moist soil so that there is water available to plant roots. Check soil moisture occasionally, never allowing it to dry completely. It is also a very good idea to spray needled and broadleaf evergreens with an anti-desiccant. This acts as a protective coating for plant foliage and stems as it helps them retain moisture.

With just a little care and forethought, you can easily prepare containers for winter without risking the plants and arrangements you have so carefully cultivated.

over-winter-2
over-winter-1