Monthly Archives: April 2019

Timing For Crabgrass Prevention

Crabgrass prevention is important in lawn care, and timing is key to ensuring success. Knowing when to apply pre-emergent herbicides and other products can help you prevent crabgrass from taking over your lawn. Understanding the best times for application will also help you save money by avoiding unnecessary treatments.

The time for crabgrass prevention is late April and early May. Dill’s Greenhouse carries the Preen and GreenView lines of crabgrass herbicide and fertilizer. The most important thing to remember about timing for crabgrass prevention is that if you wait too long, you may end up with a new crabgrass season.

Crabgrass is an opportunistic annual weed that will grow in your lawn’s thin and bare spots. The first crabgrass to germinate is going to be the seeds that are laying on a south-facing slope, next to the house or next to a sidewalk where the reflection of the sun has heated up the soil to such a point where the crabgrass is ready to germinate. And then it’s going to continue to germinate, kind of like waves hitting a beach, all the way into the early part of the summer.

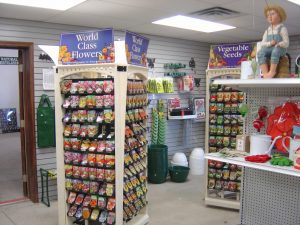
Crabgrass can take over your lawn, but a little action controls it. Learn how to get rid of crabgrass and how to prevent crabgrass from returning by asking the knowledgeable staff at Dill’s Greenhouse.

How To Determine Your Grass Type

Spring is a great time to reseed your lawn. And most homeowners like to match the grass type that is currently growing.

Lawns and in central Ohio, as well as most of the state, are a combination typically of Kentucky bluegrass, perennial ryegrass, fine fescue and turf type tall fescue. So it’s usually not just one single type of grass.

The only thing that’s going be a lot different than texture is a fine fescue, which has a very small diameter blade.

Another situation could be that your established lawn has become more shaded because of tree growth over the past 20 to 30 years. Your grass type has maybe shifted more towards the fine rescues that probably were there to begin with.

Grass varieties that we have today are so much better than the ones that were around 30 years ago. One of the things you’ll notice when you put down new grass seed, those newly seeded areas will look dark green, and may even start look better than what your existing lawn looks like.

Blueberry Bush Care

Plump, juicy berries are now easy to grow in your backyard on bushes that are resistant to most pests and diseases, and can produce for up to 20 years.

How to plant blueberry bushes.

  • Select a sunny, sheltered spot.
  • Blueberries thrive in soil that is acidic. The soil pH should ideally be between 4 and 5.
  • The blueberry is a shallow-rooted plant, so it requires a soil that holds moisture, but also drains well and doesn’t stay wet. Watering needs fill the surface pockets that are minute in size, and the soil needs to hold the nutrients and water.
  • Mix organic matter into the soil before you set your blueberry bushes.
  • Bushes should be planted as early in the spring as possible. If available, 1- to 3-year-old plants are a good choice.
  • Dig holes about 20 inches deep and 18 inches wide (about twice as wide and twice as deep as the roots of the plant).
  • Space bushes about 5 feet apart in a row, with at least 8 feet between rows.
  • Set the bush in the hole with its roots spread out. Don’t plant the bush any deeper than it grew in the pot.
  • Pack the hole tightly with soil.
  • Apply fertilizer one month after planting, not at the time of planting. Apply ½ ounce of a 10-10-10 fertilizer in a band around the plant 6 to 12 inches from the crown.

Do not let them go dry in the middle of summer. They just they will not put up with that.

Humans aren’t the only fans of blueberries. Blueberries are a favorite snack of hungry birds, so it’s recommended that you protect blueberry bushes ahead of time with netting or other methods.

Window Box Prep

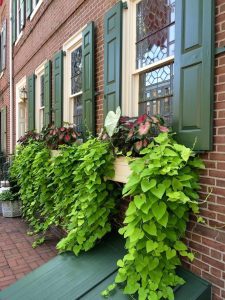
Have you ever considered trying window boxes across the front of your house? The soil mixture you use is extremely important in the success of how well your plants will do this season.

Above all, don’t use garden soil. You want something that’s going to hold the moisture, because window boxes drain pretty well. Using a moisture control potting mix would be the ideal choice.

For flower choices, nothing looks better than lots of color and plants that hang over the sides. Consider something like the wave petunias. Add a little bit of vinca vine that will also hang down or sweet potato vine.

Make sure that the window boxes don’t dry out. If they are situated under a big overhang, that’s going to keep them from being watered from the rain. You’ll need to make sure you keep the boxes watered, so they don’t dry out and put the plants in a daily stress.

Window boxes take a little bit more management than the same plants in the ground, but well worth the effort!

Killing Wild Onions In Your Yard

Wild onions in your yard. What to do?

Wild onions (Allium canadense) can be found in many gardens and lawns, and wherever they are found, a frustrated gardener is sure to be found nearby. These difficult to control weeds are the bane of many gardens, but with determination and a little hard work, you can get rid of wild onions once and for all.

Wild onion plants are difficult to control for two reasons.

First, because they grow from bulbs and bulblets, which break apart from each other easily, so it is difficult to remove an entire clump without leaving some roots behind.

Second, the thin waxy leaves make it difficult for herbicides to stick to the leaves and, even if it does, the wax makes it difficult for the herbicide to penetrate into the wild onion plant.

Killing wild onions starts with removing as much of the clump of wild onions as possible. Don’t try to pull the clump of wild onions out of the ground. The small bulblets are designed to pull away from the mother plant when pulled, which leaves extra bulbs in the ground that will rapidly regrow. Instead, dig the clump out of the ground with a spade or a trowel. Throw the entire clump away. Do not try to shake excess dirt off back into the hole and do not compost. If you do, this will only respread the wild onion bulblets back into your garden.

Keeping them mowed down or cut off is another way to controlling them. By keeping them under control with mowing, you’re simply discouraging the foliage so they can’t remanufacture the bulb.

And over one or two years they will simply start to go away.

Storage Methods Can Affect Plant Seeds Longetivy

Seed packets are an essential part of gardening and can be used for multiple seasons.

Your seed packets from over the past few seasons may or may not be worth using this season, depending on where you stored them, and the type of seeds they contain.

Seeds are alive, but they don’t live forever. When you buy a packet of seeds, government standards assure you that a minimum percentage of them are alive. You can find the packing date stamped on the packet.

Vegetable Seeds

The best storage: Low temperature and low humidity slow biological and chemical reactions and slow the seeds’ aging. Try sealed canning jars in your freezer.

Sow it or throw it: Seeds differ in how long they remain viable. It’s not worth sowing celery, parsley, or parsnip seeds after they are over a year old. On the other hand, two years can be expected from packets of carrot, onion, and sweet-corn seed. Three years from peas and beans, radishes, and beets. And four or five years from cabbage, broccoli, Brussels sprouts, cucumbers, melons, and lettuce.

Flower Seeds 

The shortest-lived are delphinium, aster, candytuft, and phlox. Packets of alyssum, Shasta daisy, calendula, sweet peas, poppies, and marigolds can be reused for five or 10 years.

Give them a test: A yearly germination test is a good way to check whether an old seed packet is worth saving. Each spring, count out 15-20 seeds from each packet to be tested. Spread the seeds between two moist paper towels on a plate. Invert another plate over the first plate to hold in moisture and keep them in a 75-degree place.

After a couple of weeks, peel apart the paper towels and count the number of germinated seeds If very few germinated, head to your garden center for some new seed packets.

Knowing what type of seeds your seed packets contain can help you determine if they are still worth using this season or not. Different types of seeds have different shelf lives and it’s important to understand these differences before planting them in your garden.

Dill’s Greenhouse carries a great selection of heirloom, organic, and hybridized seeds. Don’t waste your time with old seeds. Stop by and ask our knowledgeable staff all of your questions.


Non-invasive Ground Covers

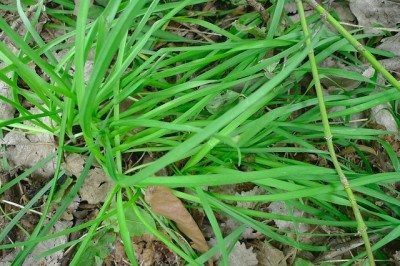
We often get this question at Dill’s Greenhouse…

Is there any kind of perennial ground cover that is not too intrusive, that could grow around my plants slowly, that would it look a little nicer, and I could manage?

The answer is yes, “but.” The “but” part is that you’re going to be adding one more plant to the area. However, you can add a uniform cover of that same plant.

You may be putting yourself into a position to have to do some strategic weed killing. Use a little sponge, an oil can, however you can drip the weed killer on.

One perennial to try is ajuga. It’s also called carpet bugle. There is a green form, and there is a beautiful burgundy form. There is also a blended form of burgundy and cream. It grows roughly 2 inches tall. The flower will stick up to about 6 inches. It’s a fairly rambunctious perennial plant and will spread nicely an uniformly, while not really taking over like invasive plants do.

Are Lilies Poisonous to Cats?

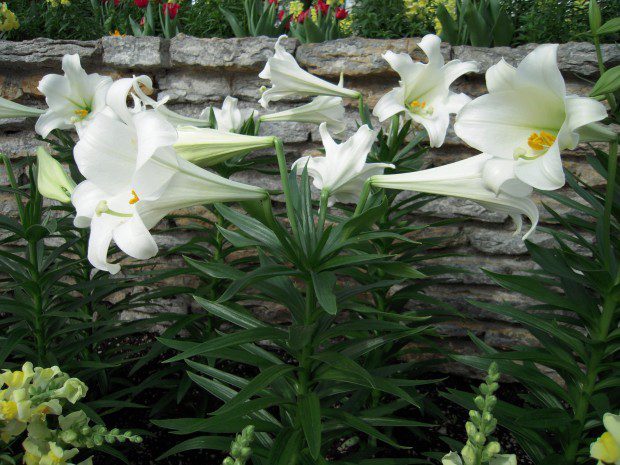
We don’t want to discourage anyone from going out and getting a beautiful Easter lily because that is the thing to do right now, but do Easter Lilies and cats mix?

The short answer is no!

Please use EXTREME caution when bringing in flowers, bouquets, and new plants into your cat-friendly household. Easter lilies are extremely poisonous to cats, and just 1-2 leaves (or even the pollen) can kill a cat! Even small ingestions can result in severe kidney failure.

The sources of poisoning? Many plants of the Lilium and Hemerocallis species are very poisoning. Commonly known as the Tiger, Day, Asiatic, Easter, or Japanese Show lily, these plants result in severe acute kidney failure.

The exact toxin has not been identified, but is known to be water soluble. All parts of the plant – the leaf, pollen, stem, flower are considered poisonous. Kidney damage (specifically, renal tubular necrosis) occurs within 24-72 hours of ingestion.

Signs of poisoning often develop within 6-12 hours of exposure. Early signs include vomiting, inappetance, lethargy, and dehydration. Untreated, signs worsen as acute kidney failure develops, and signs of not urinating or urinating too frequently, not drinking or excessive thirst, and inflammation of the pancreas may be seen with lily poisoning. Rarer signs include walking drunk, disorientation, tremors, and even seizures.

Sadly, there is not antidote for lily poisoning. That said, prompt veterinary attention is necessary. The sooner you bring in your cat, the better and more efficiently your veterinarian can treat the poisoning.

What about other types of lilies? Other types of lilies like Peace, Peruvian, and Calla lilies don’t cause deadly kidney failure, but they also can be mildly poisonous too, as they contain oxalate crystals which result in tissue irritation to the mouth, tongue, pharynx, and esophagus – resulting in minor drooling. If your cat is seen consuming any part of a lily, bring your cat (and the plant) immediately to a veterinarian for medical care.

Core Aeration in the Spring

Is springtime a good time to do core aeration?

Actually you can core aerate in the spring. Do it before you put down any crabgrass preventer.

If you’ve already put down a crabgrass preventer, then core aeration will break down that weed prevention barrier that you just put down. So do the core aeration first, and if you wanted to do some seed that would work out fine.

So many people don’t realize quite how crabgrass preventer works.

It goes down, it gets moistened, it spreads out in the top surface of your lawn and forms a barrier. And if anything breaks that barrier, from a dog digging, a child’s slipping and sliding in the lawn, or core aeration, all of these will break that barrier.

So save time and money. In the right order, you should get a new lawn in just a few weeks.

Plant division, the importance of understanding your plant’s needs

Let’s start with plant division. This is a process where a mature plant is separated into smaller sections, each with its own roots and stems. This practice is beneficial for a multitude of reasons. 

  • It helps control the size of the plant, preventing it from becoming overcrowded. 
  • It also allows for the creation of new plants, which is particularly useful for propagating rare or valuable species. 
  • Most importantly, it promotes overall plant health by rejuvenating older plants and encouraging new growth. 

A prime example of this practice is the division of hosta plants, a common and easily manageable species. 

Understanding the relationship between a plant and the desired outcome 

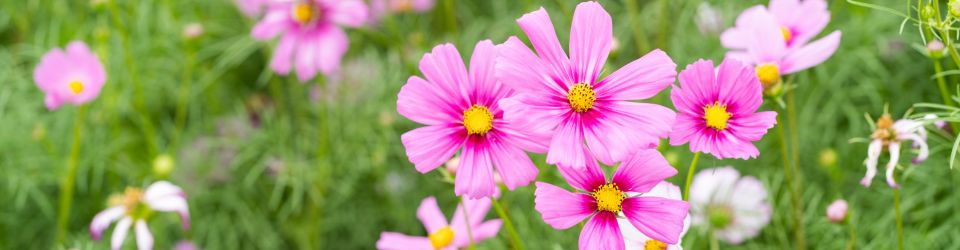
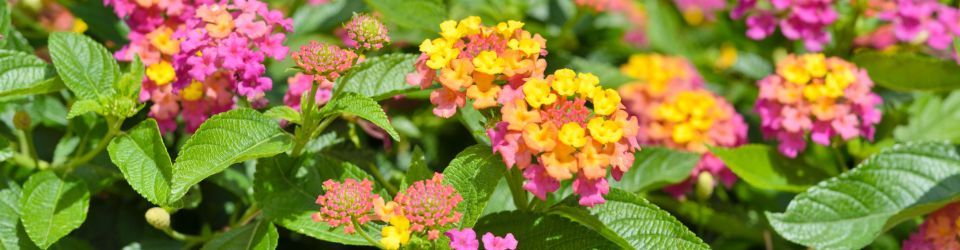
It’s crucial to know what you want to achieve with a plant before choosing and caring for it. Different plants have different characteristics and requirements, and selecting the right plant for your desired outcome is key to success. This could mean choosing a large tree for shade or colorful annuals to brighten your flower bed. It’s also vital to consider the environmental conditions in which the plant will thrive, such as sunlight, soil type, and moisture levels.

The importance of a plant’s size

The size of a plant can significantly impact its growth and overall health. Larger plants generally have a greater root system, allowing them to access more resources, while smaller plants may struggle to obtain sufficient nutrients and water. The size of a plant can also affect its ability to compete with other plants for resources with larger plants often overshadowing their smaller counterparts. When planting smaller plants, it’s important to prepare the soil by digging the entire area. This ensures the soil is aerated, allowing for better root development and nutrient absorption. It also removes any obstacles or debris that could hinder the plant’s growth.