Monthly Archives: November 2024

Holiday “Cactus” (Schlumbergera varieties)

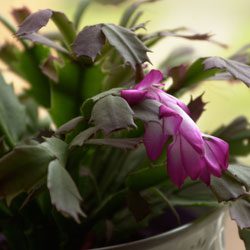
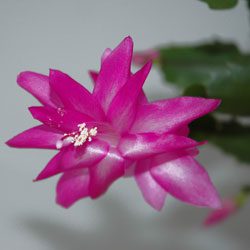
Have you noticed the odd-looking plants with neon bright flowers blooming since Halloween? You may know them as Thanksgiving cactus, Christmas cactus or Crab Cactus. Whatever you call them, they’re certainly bright and cheerful, and bring a bold bloom of color indoors during the winter months.

These plants don’t resemble their cactus cousins. Native to forests and jungles rather than desert regions, these plants are generally epiphytic, growing on trees or rocks. Distinctly flattened claw-like joints approximately 1″ long form the arched and hanging stems. The 2 ½ – 3″ tubular blossoms emerge from the stem tips.

In case you’re wondering, the Easter cactus is a close relative but a different genus. However, in addition to blooming in the spring, another difference is the blossoms also form at the stem joints. Hybrids now bloom at different times of the year and new introductions create a wider variety of colors including pink, reddish, white, orange, purple and even multicolored blooms on the same plant. You can actually create a blooming rainbow effect over the entire year, with proper care and diligent upkeep.

The Christmas cactus usually begins flowering when night temperatures are around 55° Fahrenheit. After the buds are set, night temperatures of 60-70° Fahrenheit and slightly higher during the day are ideal. Many people summer their plants outdoors in a shady location and bring them indoors after bud set to enjoy during the holidays.

Caring for Holiday Cacti

Holiday cacti are as easy to grow as most houseplants. These easy instructions can help your Christmas cactus become part of your holiday traditions for years to come.

  1. Use general all-purpose container potting soil and a pot with sufficient drainage to protect the roots.
  2. Keep the soil moist while the cactus is blooming and allow it to become mostly dry while resting before watering again.
  3. Fertilize “weakly, weekly” while flowering. Otherwise, water every other month without fertilization.
  4. Place the cactus where it will receive bright indirect light for 6-8 hours a day. Avoid direct sunlight that can burn the plant.
  5. Transplant the cactus to a larger container when roots are very tight and blooming is less vigorous.

A holiday cactus can be a fine addition to any winter decorations, or by itself it will brighten any room for weeks with its bold, colorful blooms. With proper care, you’ll enjoy your cactus for many holiday seasons.
cactus-2

cactus-1

Season of the Ficus

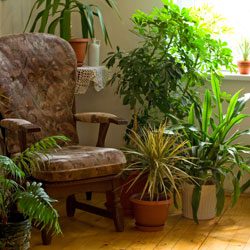
Houseplants transform a house into a home, purify the air, promote relaxation and improve concentration. The ficus group includes four popular small trees grown as houseplants, each looking very different from one another, and each incorporating these and other great benefits. Wonderful as gifts, smaller plants continue growing and reminding the recipient of the giver’s good wishes for many years. A larger specimen can anchor a room or office, fill an awkward space and set a sophisticated decorating tone. We sell both small and large sizes of these easy-to-grow plants.

Ficus Types

There are several types of ficus to choose from. Whether you are giving the plant as a gift or want to enhance your own home with more greenery, consider these different varieties to choose the ficus option that best suits your needs.

  • Weeping Fig (Ficus benjimina): Your classic ficus variety, the weeping fig has green or variegated foliage with 2-4″ long, twisted and pointed leaves on twiggy, spindly branches. The tree has a graceful rounded and weeping appearance. Can reach 5-6′ tall, making it ideal for smaller spaces such as apartments or condominiums.
  • Rubbertree (Ficus elastica decora): Emerging from bright red sheaths, the large, thick, oval variegated or green leaves of the rubbertree grow 10-12″ long and 6″ wide with a central rib of white on top and red on the underside. These can reach the ceiling in time, and this plant is often considered foolproof for its easy care. Because of the space needs, these plants are best for larger areas with abundant room.
  • Fiddle Leaf Fig (Ficus F. lyrata): Similar in size to the rubbertree with a strong structural form, this fig’s leaves mimic the elegant, curving shape of a violin. The large leathery and textured leaves reach 12-18″ in length. This is another variety that will do best with more space so its form is well appreciated.
  • Indian Laurel (Ficus retusa nitida): Growing to a 6′ tall weeper, dark green oval 2-4″ long leaves cover the drooping branches of this elegant small tree. New leaves provide light pink and bright green color contrasts to the older leaves. This is an ideal specimen for smaller spaces or anywhere a burst of natural color is appreciated.

All of these ficus varieties are among the easiest to grow houseplants, whether you want to nurture them from smaller, younger plants or are interested in larger, more mature specimens. Stop on by and pick some wonderful ficus plants up for gifts or for yourself.

ficus

Forcing Bulbs for the Holidays and Beyond

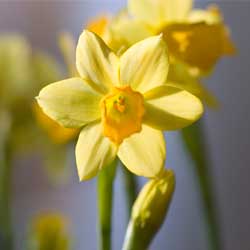
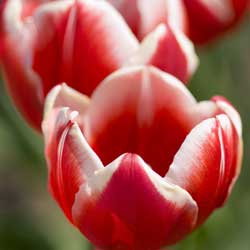
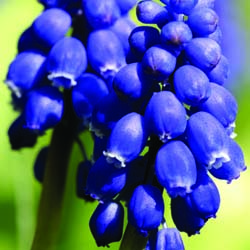
Blooming baskets and pots of brightly colored forced bulbs make a fabulous holiday or winter gift for others and ourselves. What better way to dress up the holiday home or cheer up a long, cold winter, reminding us of impending spring?

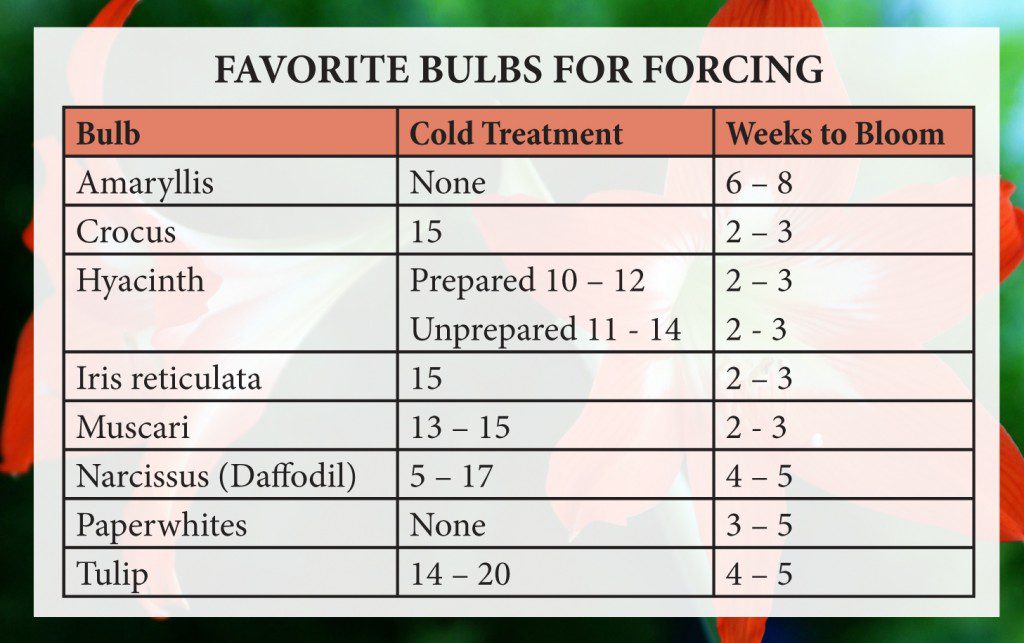
The forcing process should begin in September or early October if you want the bulbs to be blooming when given in late November or December. If you are starting late, no worries, just print these easy instructions to give with your potted bulbs and let the recipient do the rest.

Forcing Bulbs in 10 Easy Steps

  1. Count backwards from the desired bloom date the number of weeks required for bloom plus the number of weeks required for cooling. This is the planting date. To use your forced bulbs as a blooming Christmas gift, you will have to plant in September.
  2. Select a container that has drainage holes and is at least twice as tall as the unplanted bulb. There is an exception for paperwhites that you plan to grow in stone. These should be placed in a container without drainage holes.
  3. Mix a good bulb fertilizer into your potting soil according to directions on the package.
  4. Fill enough of your container with potting soil so that when the bulb is placed on top of the soil the tip of the bulb sits slightly above the lip.
  5. Place your bulbs on top of the soil. Keep them close without touching each other or the container.
  6. Continue to fill the area between the bulbs with soil. Fill until slightly below the lip.
  7. Water the soil gently, allowing excess to drain.
  8. Refrigerate potted bulbs for the appropriate amount of time. Check frequently and water as necessary to keep the soil moist.
  9. Gradually acclimate planted bulbs to a warm, bright location when their required cooling time has been completed. Move back out of direct sun and into a cooler location when the bulbs finally flower to prolong the blooms.
  10.  Rotate container frequently to produce straight stems.

forcedbulbschart

Post Bloom

After flowering, cut back flower stems and place your containers back in full sun. Continue to water until the foliage dies back naturally. When the foliage is completely spent, place containers in a cool, dry place until early next fall when the bulbs may be safely planted into the garden. Forced bulbs cannot be forced a second time. Paperwhites will never bloom again and should be discarded after forcing. Previously forced bulbs, after planting in the ground, may skip a year’s bloom but will eventually return to their former beauty and regular schedule.

bulbs_5

bulbs_6

bulbs_1

bulbs_2

bulbs_3

Bird Feeding Basics

Winter is the perfect time to think about attracting bird visitors to your yard. Bird watching is a great hobby that can be enjoyed by both younger and older members of the family and getting started is both easy and inexpensive.

Bird Feeders

The type of bird feeders you select will depend on where you want to observe your feathered friends, as well as the kinds of foods you are offering and the types of birds you want to attract.

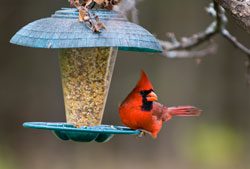
Hanging feeders, suitable for smaller birds, can be hung from a tree, pole or hook. Platform feeders can be mounted on a pole/post, deck railing or fence, or even just set on the ground. There are also window feeders that can be mounted directly to a window for enjoyment close at hand plus suet feeders or cages which hold suet cakes – a must for attracting insect-eating woodpeckers and nuthatches.

Feeders should be located in a sheltered place where they are not exposed to strong winds or vulnerable to attack from predators such as hawks and cats. Try grouping several different feeders together to attract the maximum number of different birds. All feeders should be kept clean and in good repair.

Bird Seeds

Just like us, birds have certain food preferences. Black oil sunflower seed is one of the most popular seeds, attracting a large variety of different birds. Some seeds such as Nyjer (thistle) are very specific – if you want to attract colorful goldfinches, then this one is for you. Mixes containing sunflower, thistle, cracked corn, millet and other seeds are also available, to tempt many bird visitors. Larger birds that feed on the ground, such as doves, quail and wild turkeys, will love cracked corn.

Natural Food Sources

If you are serious about attracting birds to your yard throughout the year, then think about planting trees, shrubs, perennials and even annuals that will provide natural foods at different times. Birds love berry-producers such as crabapples, hollies, hawthorns and viburnums. Perennial favorites for seed eaters include members of the black-eyed susan family (Rudbeckia), coneflowers (Echinacea), goldenrod (Solidago) and coreopsis. Seed heads of ornamental grasses are also highly sought after. Of the annuals, sunflower (of course!), marigolds and cosmos are popular. Just be sure to leave seed heads on the plants so birds can take advantage of them.

Don’t Forget Water!

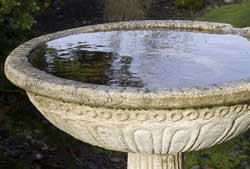
Water for bathing and drinking is one of the basic requirements for all birds, even for species that won’t visit feeders. If you already have a bird bath, be sure to keep it filled with clear, fresh water. A bird bath heater will keep water available even during freezing weather. A mister, dripper or bubbler will move the water around and attract even more birds with sparkling splashes.

From feeders and seeds to plants and water sources, we have everything you need to get started attracting birds. Come on in today and you’ll be able to enjoy your feathered friends this fall and winter!

bird-feeding-1

bird-feeding-2

bird-feeding-3

Celebrating the Holiday in Small Spaces: Norfolk Island Pine

Is your space a little too tight for a full-sized Christmas tree? Do you dread the thought of lugging a seasonal evergreen up those narrow apartment or condo steps? Does the thought of vacuuming up all those pointy brown needles and disposing of the debris when the holiday is over provoke panic attack? Do you prefer a living decoration instead of chopping down a tree for a temporary ornament, but you don’t have anywhere to plant a larger pine? Fear not, a Norfolk Island pine may be the solution.

About Norfolk Island Pines

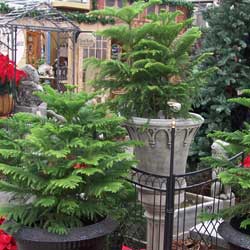
Norfolk Island Pine, Araucaria heterophylla, is a South Pacific native and makes a wonderful stand-in for the traditional indoor Christmas tree. This evergreen houseplant is smaller in stature with soft, lush, deep-green needles borne on graceful branches. It may be decorated with a strand of mini-lights and seasonal bows and enjoyed long after the holiday has passed.

Caring for this plant is easy, and with proper care you can enjoy your mini-pine long after the holidays end.

  • Place your Norfolk Island Pine in bright but indirect light. Turn the plant a quarter turn each week to help it grow straight and prevent it from leaning in the direction of the light.
  • Feed your tree with an all-purpose, balanced fertilizer labeled for houseplants once a month during the growing season. Allow the plant to rest from fertilization during the winter months and resume again in the spring.
  • Water when the top inch of potting mix feels dry. Allow all excess water to drain from the bottom of the pot (a drainage hole is essential). Be careful not to overwater or the roots may rot.
  • Humidity is important for a healthy plant, and is greatly reduced during the winter months when the heater is on. Running a humidifier, placing your plant on a humidity tray and grouping your houseplants together will all help raise the humidity level in your home to protect your pine.
  • Never prune your Norfolk Island pine. It will ruin the shape of the plant. The exception is if branches are damaged, but only trim as little as possible.
  • Replant when your plant outgrows its current pot, choosing a new pot that is just slightly larger than the old pot.

Decorating Norfolk Island Pines

While these trees have a distinct pine look, their small size and delicate branches cannot withstand great amounts of classic Christmas tree decorations. Instead of heavy bulbs and bulky light strands, use mini-lights and LED strands. Opt for miniature ornaments, thinner garland strands and other tree decorations sized for smaller trees to create a beautiful look without the tree seeming overwhelmed and without risking damage to the tree. A small tree skirt can help conceal a pot, and you can also hang additional ornaments or garlands from the pot itself.

Stop by and choose from our selection of Norfolk Island pine for this year’s Christmas tree or for holiday gift giving. We also carry a great variety of other holiday plants – succulents, bulbs, and more – ideal for gift giving.

Making a Terrarium

Hold onto your gardening hats, folks! Remember terrariums? A new trend revitalizing this old style is now better than ever. Creating a theme for your terrarium is easier too, with the all the miniatures now available. Remember those skinny-necked bottles and what a hassle they were? New container styles make terrariums easier to plant, simple to maintain and more beautiful in your home.

Style

What is your terrarium’s style? Tropical with ferns, arid with cacti or beach-like with tiny grasses, sand and water-like pebbles? Will you have figures such as fairies or gnomes? To choose the plants, consider the lighting where you plan to place the terrarium. If your gnome home is to be in the corner, consider using a cute fluorescent light or similar illumination to help keep your terrarium’s plants healthy and thriving.

Container Shape and Size

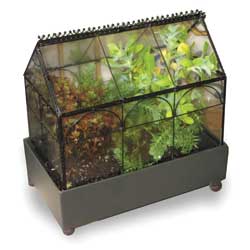
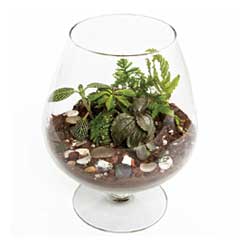
Choose your container and ensure it has enough room for your completed dream. Clear glass allows views of different layers of sand, soil and top dressing, giving your terrarium extra depth. Container shapes include hanging, footed, cylindrical, spherical, even leaning. Multi-sided geometric shapes are popular, as are smooth, curved shapes with a natural flow. If your garden includes tropical plants, consider a container with a smaller opening or a lid to increase humidity for healthier plants.

Don’t forget to consider size – tiny terrariums with just a plant or two are popular and can be hung like ornaments or make great gifts, while larger containers can create an entire microcosm and unique environment for a stunning display.

How to Plant

Planting a terrarium takes a little extra care, but is no more difficult than planting any houseplant.

  1. Put an inch or two of small gravel, pebbles or expanded clay pellets into the container, providing a drainage base. Mixing in several tablespoons of horticultural charcoal prevents odors. If the container is large enough, layer other colors or sizes of pebbles or sands to create visual interest when viewed from the side.
  2. Soil goes in next. Many plants grow well in light soils mixed with peat moss and vermiculite or perlite. Moistened coir is another option. Alternatively, consider special prepared soil mixes for African violets, succulents or cacti.
  3. Create a landscape plan by first arranging the plants on the tabletop to determine where they will be placed in the container, taking into account how the plants may touch the sides or top of the container.
  4. Plant the largest plant first. Dig a small hole, place the plant, and firmly tamp the soil around it. This is very important to stabilize the plants and remove air pockets. If the space is tight, smaller plants may be able to help stabilize larger plants.
  5. After placing the plants, you may want to top-dress with decorative pebbles or bark. Sand looks great around cacti. This is also the time to place fairies, cottages, twigs, larger stones, marbles and other decorative items in your terrarium to create the desired theme.
  6. When everything looks good (look at it from all sides and angles), use a small artist brush to clean any loose dirt or sand away from the sides and leaves.
  7. Use a mister to water the plants. Because the container acts as a small biosphere and much of the moisture is recycled, a little water lasts for quite awhile. Do not overwater your terrarium or the plants may rot, and replacing them can be a challenge.

Place your terrarium in its new location and enjoy its beauty and your accomplishment!