Monthly Archives: August 2025

The Great Squirrel Battle for the Bulbs

Autumn is the catalog time of year, when gardeners devour and drool over the spring-blooming bulb catalogs, eagerly fantasizing about next year’s flowerbeds. We picture drifts of crocus and gaily swaying tulips, lush daffodils and glorious hyacinths. Snowdrops, irises, daylilies… Ah, the garden will be great this next spring.

Then we remember last spring – hours of labor and dozens of bulbs meticulously planted, but only one or two emerged to flaunt their blooms. What happened?

Squirrels and Bulbs

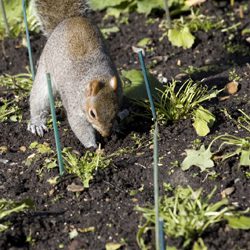
Squirrels like flower bulbs just as much as gardeners, but unfortunately not for their beauty. From the looks of the remains – chewed remnants, dug up holes, battered foliage – those bulbs became expensive squirrel food. Fortunately, if you want to plant daffodils, alliums, scilla, hyacinths, squills or fritillaria, your bulbs should be safe. Generally, squirrels don’t eat these. But how can you protect the bulbs that make the tastiest squirrel treats?

Keeping Squirrels Out of the Flowerbeds

Go ahead and order your bulbs. While you’re waiting for delivery, decide which of the three basic methods you will use to prevent the squirrel attacks. A small investment of time and materials will protect your bulbs.

  1. Mesh Barriers
    Wire mesh is the best protection to keep squirrels away from bulbs. Dig the hole for several bulbs, make a “cage” using mesh around the bulbs and fill in the soil. If the squirrels dig, the mesh will prevent them from eating the bulbs. You may also plant the bulbs as usual and place a layer of mesh on the soil. You’ll have to secure it to keep it in place then cover with mulch. Be sure the mesh layer is wide enough so squirrels cannot easily dig around the sides to reach the bulbs.
  1. Repellants
    Garden centers sell many different squirrel repellants, and deer repellants also repel squirrels. Some gardeners swear to the effective use of red pepper flakes mixed in the soil around, and over, the bulbs. Many squirrels don’t like spicy tastes, but pepper flakes may need to be replaced after heavy spring rains to be the most effective.
  1. Sharp Gravel
    Adding sharp gravel to the soil around and over the bulbs also deters squirrels from digging. Not only do they not like the feel of the gravel on their sensitive paws, but the gravel – which is heavier than dirt or mulch – is more difficult to move, so the bulbs stay safer.

There is another option to keep squirrels away from bulbs without completely discouraging their visits. If you can’t beat ’em, join ’em – because squirrels look for the easiest food sources, a squirrel feeding station stocked with corn and peanuts may be just the thing to keep the squirrels from looking for your buried treasures!

squirreldigging_250x250

bulbs_250x250

Bulbs: Increasing Your Yield

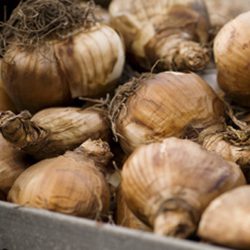
When you visit our garden center, you’ll find an incredible variety of autumn “bulbs.” Although they may look strange at this time of year, these “ugly ducklings” will become beautiful swans in your spring garden. It’s hard to imagine how these odd lumps can grow underground and become so gorgeous, but if you plant them now you will enjoy an incredible floral display next spring and summer.

How Bulbs Grow and Multiply

Did you know many bulbs will increase in quantity over time? Most gardeners simply divide their bulbs after a few years and move them to other parts of the garden or give extras away to friends. Dividing your yield is easy when you identify what type of bulb you are dealing with.

There are five distinct types of “bulbs” and although not all of these are available in the fall and some are not winter hardy, it is important to mention them to be able to understand their differences.

BULB TYPE

EXAMPLES

DESCRIPTION

HOW TO DIVIDE (after digging up)

Rhizome

Begonia, Calla, Canna, Ginger, Iris, Lily of the Valley, Tuberose


Grows horizontally from the pointed ends. As this bulb matures, it branches and develops other pointed growing ends. Roots grow from the bottom. Cut the rhizome into sections and ensure each piece has at least one pointed growing tip.
Tuber Anemone, Caladium, Cyclamen, Potato, Tuberous Begonia Buds and roots form anywhere on the surface. Tuber continues to enlarge with more eyes and roots. No basal plate or growing point. Cut the tuber into sections with at least one growing bud and root on each section
Tuberous Roots

Clivia, Dahlia, Daylily, Liatris, Sweet Potato


Actually a swollen root, new tuberous roots grow in a cluster from the base of the plant’s old stem or central crown. Divide the root cluster so each division includes roots and one or more growth buds from the stem base.
True Bulb Allium, Hyacinth, Lily, Daffodils, Snowdrops, Tulips Roundish shape with a pointed tip, covered with scales, and has flattened base plate where roots form. May have a papery outer skin. Forms little bulbs, “offsets” at base. Separate small offsets and plant individually.
Corm

Crocosmia, Crocus, Freesia, Gladiolus


Similar in shape to true bulb however there are no scales. Covered by a “tunic” of fibers. A corm decomposes each year; a new corm develops on top with smaller corms (cormels) on the sides or along the base plate. Separate new corms from smaller corms and plant individually.

Using Your Divided Bulbs

Once you’ve successfully divided your bulbs and bulb-like flowers, what do you do with your extra bulbs? There are many great options…

  • Transplant them into different parts of your yard to create a uniform, coordinated landscape with similar plants.
  • Give them away to neighbors, family members, friends, coworkers or anyone who would like to add new flowers to their yard.
  • Donate them to churches, schools, parks, senior centers or other places where extra flowers for landscaping will be appreciated.

As your bulbs continue to multiply, you will enjoy having more and more to choose from to create your ideal colorful, fantastic floral landscape.

bulbs_4bulbs_1bulbs_2 

Fall-Blooming Camellias

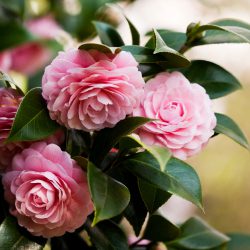
We love camellias! An Asian native and an old southern standby, they are now a favorite in the northern states as well. In recent years, new varieties have been developed for their increased cold hardiness, giving northern gardeners even more opportunities to enjoy these charming beauties. Blooming in October, November and even into early December, fall-blooming camellias provide an abundance of colorful showy blooms that can now be enjoyed in colder climates.

Camellias do best in rich, moist, well-drained, acidic (5.5-6.5 pH) soil. Plant camellias in a location where they will be protected from the drying winter sun and wind or else the delicate blooms may suffer. Because these shrubs are shallow-rooted, they should be planted no deeper than they are planted in the pot that you purchase them in. Apply 3-4 inches of mulch to the root zone to keep soil moist and control weeds. Compost added to the soil can also help provide suitable nutrition to keep these plants healthy. Water camellias first when newly planted and frequently during times of low rainfall – a drip system can be a great option to keep these shrubs suitably moist. Fertilize in the spring with a fertilizer specified for acid-loving plants. If purchasing and planting camellias in the fall, be sure to give them a little extra TLC to help them through their first couple of winters and they will reward you with their beauty for years to come.

To help you choose the most beautiful fall-blooming camellias for your landscape, consider these attractive cultivar options!

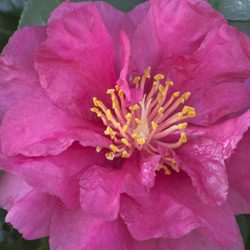
  • Ashton’s Pride: Lavender-pink, single flowers with yellow centers
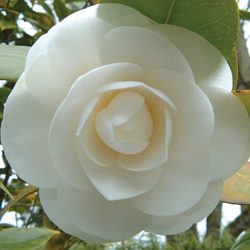
  • Ashton’s Snow: Creamy white flowers in semi-double blooms
  • Long Island Pink: Single blooms with bright pink colors and ruffled petals
  • Mason Farm: Pink, single flowers with a white tinge
  • Northern Exposure: Pink buds that open to single white, papery flowers
  • Winter’s Darling: Deep pink flowers with anemone shapes
  • Winter’s Fancy: Deep rich pink, semi-double blooms
  • Winter’s Interlude: Light pink blooms with anemone shapes and peachy centers
  • Winter’s Joy: Bright bold pink, semi-double blooms
  • Winter’s Star: Single lavender-pink pale blooms with yellow centers
  • Winter’s Water Lily: Elegant white flowers with a formal double shape

No matter which fall-blooming camellia you choose, if you give it the proper care, it will love you right back with abundant growth and stunning blooms that bring an air of southern charm and hospitality to your yard.

camellia_250x250_3camellia_250x250_1

camellia_250x250_2

Autumn: Why Plant Now?

Although many gardeners plant trees and shrubs in the spring, knowledgeable gardeners plant in the fall to take advantage of all this fabulous season has to offer. But why is fall planting better than spring planting?

  • Stress Reduction
    Transplanting causes stress as plants are removed from containers, balls or established locations and changed to new locations. Planting in the fall, when a plant is entering dormancy and is generally hardier and sturdier, reduces this stress so the plant can thrive.
  • Establishing Strong Roots
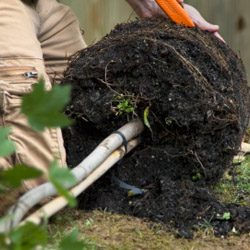
    Fall planting “establishes” trees and shrubs by encouraging root growth. Because the soil is still warm, the roots continue to develop until freezing, though the upper parts of the plant are already dormant. When transplanting in the spring, the developed roots are active and delicate tips or rootlets, as well as buds and new leaves, are more easily damaged.
  • Weather Resiliency
    Trees and shrubs planted in the fall are better able to withstand the rigors of the next summer’s heat and dry conditions because they have much longer to develop healthy roots systems and become thoroughly established. This is especially critical in dry climates or areas prone to drought or irregular rainfall.
  • Faster Maturity
    The “head-start” of fall planting results in a larger plant in less time, helping create a mature landscape without waiting for smaller plants to catch up. This can be especially critical when replacing dead or damaged plants in a mature landscape to avoid a gap or uneven look.
  • Water Conservation
    Planting in the fall saves watering time and promotes conservation by eliminating daily watering. Cooler temperatures with the addition of both morning and evening dew contribute greatly to soil moisture availability in fall without as much supplemental watering.
  • Color Confirmation
    Fall is the best time to see a plant’s autumnal color. Planting in the fall eliminates the surprise of the wrong color or unexpected shades that may not coordinate with nearby plants. By planting in autumn, you’ll know exactly what you’re purchasing and planting, and you will be able to match better with your existing landscape.
  • Saving Money
    Last but definitely not least, buying your beautiful trees and shrubs in autumn can save big money. We discount prices on trees and shrubs to create room for holiday season materials and pass the savings on to you. Selection may be more limited later in fall, however, so don’t wait too long to take advantage of great savings.

Autumn can be the ideal time to plant trees and shrubs, whether you are adding to your landscape, replacing plants or starting a whole new look. If you plant in autumn, you’ll be amazed at how lovely your landscape will look next spring.

AutumnWhyPlant_2

AutumnWhyPlant_3

Fall Lawn Care

Fall is the best time of the year to overseed your existing lawn or establish a new lawn. If your lawn is a bit thin, has bare patches or needs good care, now is the time to take care of it so it can become thoroughly established before warm temperatures arrive in spring.

Overseeding A Weak Lawn

A weak lawn may have thin or scraggly patches, seem overrun with weeds or have bare patches that are difficult to keep green and lush. Overseeding can help eliminate these problem areas and create a more consistent, luxurious lawn.

  1. Spray broadleaf weeds with a selective herbicide and wait 2 weeks for the weeds to disappear. Several treatments may be necessary if the yard is thick with weeds.
  2. Take a soil sample of your lawn to determine the pH. A garden extension service can help determine pH levels, or home test kits are available.
  3. Mow shorter than normal and rake clean to remove unnecessary debris that may keep seeds from reaching the soil.
  4. Core aerate if you have compacted soil or heavy thatch. Remove the cores and dispose of them properly to keep the soil light and airy for seeding.
  5. Apply starter fertilizer and lime if determined to be needed by the pH test, or choose a grass type that will thrive in your soil’s conditions.
  6. Dethatch your lawn if thatch is thicker than ½ inch. This can be done with heavy raking or a special dethatching rake may be necessary in extreme cases.
  7. Overseed with the proper seed. If core aerating, lightly topdress with topsoil or humus.
  8. If needed, cover the freshly seeded area with netting or hay to discourage birds or other wildlife from consuming the seed before it grows.
  9. Water daily until grass has germinated, then soak once a week to encourage deep root growth.
  10. Fertilize in late fall with fall fertilizer.

Seeding A New Lawn

If you have no existing lawn or the entire ground is overrun with nothing but weeds, it may be best to start from scratch and create the lawn of your dreams.

  1. Kill existing vegetation with nonselective herbicide. If you want to preserve nearby trees or shrubs, take steps to protect that vegetation from the treatment.
  2. Take a soil sample of your lawn to determine the pH. A testing kit can provide a good pH estimate, or a gardening center or garden extension service can provide a more precise evaluation.
  3. Prepare soil by breaking up the surface with a rake or spade using a crisscross pattern. All large lumps should be broken up, and any large rocks should be removed.
  4. Broadcast starter fertilizer, lime and gypsum as determined by the pH test. This will provide a nutrition boost for fresh seeds.
  5. Spread topsoil or humus to a ½ inch depth for appropriate planting.
  6. Rototill to a depth of 4 inches and grade smooth. This will mix all the top layers together for uniform soil and nutrition, ensuring even turf growth.
  7. Sow proper seed and mulch lightly with salt hay to control erosion and conserve moisture.
  8. Water daily until grass has germinated, then soak once a week to encourage deeper root growth to resist droughts and repel weeds.
  9. Fertilize in late fall with fall fertilizer to provide nutrition throughout the season.

Which Seed?

Not every lawn will thrive with the same type of grass seed. Allow our staff to help you select the seed that best suits your needs, soil type and planting conditions. Apply at the recommended rate and incorporate into the top ¼” of soil. Do not bury the seed or it may not germinate evenly.

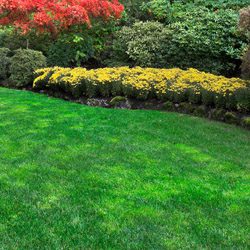
No matter what the condition of your lawn, fall is the best time to take steps to help it rejuvenate so you have an amazing lawn to enjoy in spring.

FallLawn_2FallLawn_1

Tulips: Spring Starts Now!

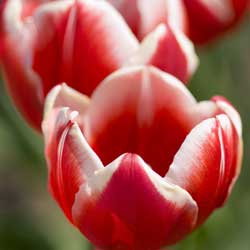
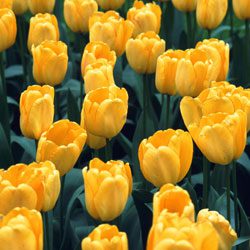
Members of the lily family, tulips are native to central and western Asia. In the 16th century, they were introduced to the Netherlands where most tulip bulbs are grown today. With over 100 species and nearly 3,000 varieties, tulips have been divided into 14 groups, including Darwin hybrids, Triumph, Lily-flowering, Double early, Rembrandt, Scheepers’ Hybrids (or French) and Parrot variations. Their classification is based on form and habit. A 15th group includes species tulips with the smallest plants growing to just 3 inches.

Tips for Planting Tulips

Tulips are an easy care addition to any landscape, and they are easier to plant than many gardeners realize.

  1. Choose only top-sized bulbs without any bruises or obvious damage. Bigger bulbs generally indicate better quality and bigger flowers.
  2. Plant bulbs as soon as purchased or store in a cool, dry location.
  3. Choose a sunny (or part sun) location with well-drained, rich soil.
  4. Plant 2” deeper than recommended to promote re-blooming each year.
  5. Apply bone meal 3 times a year – in fall when you plant, in spring as bulbs emerge from the ground and after flowering has finished. This will provide food for the foliage and bulb growth for next year’s flowers.
  6. Protect tulip bulbs from pest damage by laying wire mesh on top of your bed just beneath the soil. Sprinkling VoleBlok in the holes when planting can also be helpful.
  7. Mulch and water the bed thoroughly after planting.
  8. Plant before the ground freezes.
  9. Deadhead flowers after they have faded, but leave the foliage to die back naturally. Do not cut off the leaves until they have turned brown, or else they will not develop large enough bulbs for a good show the next year.

Tulip Timesaving Tip

Don’t have much time to plant a large, luxurious tulip bed? Plant 100 tulips in just 1 hour!

  1. Choose a part to full sun location and dig a hole 6’ x 6’ to a depth of 6-8”, placing the displaced soil on plywood or cardboard.
  2. Place 100 tulips, pointed end up, evenly over the area.
  3. Gently slide the soil from the plywood or cardboard onto the tulip bulbs. Tamp the soil lightly, sprinkle the bed with bone meal and water well. In spring, the entire area will bloom!

Tried & True Tulip Selections

Some tulips can be finicky, and while some tulips will disappear from your garden after a year or two, these selections promise trouble-free blooms for years!

  • ‘Daydream’ – Darwin tulip, changing colors while in bloom to vibrant apricot-orange, blooms mid-April into May, Ht: 22”. Fragrant.
  • ‘Lilac Wonder’ – Species tulip, large rose-lilac flowers with yellow bases and anthers, blooms May, Ht: 7”. Prefers full sun.
  • T. praestans ‘Fusilier’ – Multi-flowering species tulip, orange-scarlet flowers, blooms April, Ht: 8-12”.
  • T. clusiana var. chrysantha – Species tulip, good naturalizing tetraploid, deep yellow flushed with rose toward the edges, blooms April, Ht: 8”.
  • ‘Pink Impression’ – Darwin tulip, huge flower with strong, clear pink flowers, blooms mid-April to May, Ht: 22”.
  • ‘Menton’ – Scheepers’ hybrid, blooms are shades of apricot, rose, pink and peach, late-blooming, Ht: 26”.
  • ‘Mrs. John T. Scheepers’ – Huge Scheepers’ hybrid, golden-yellow tetraploid is a three-time award winner, late-blooming, Ht: 26”.
  • ‘Persian Pearl’ – Species tulip, deep magenta-rose with buttercup yellow star on the inside, blooms April, Ht: 6”.
  • ‘Maureen’ – Scheepers’ offspring, large, oval-shaped flowers of glistening white, blooms late-May, Ht: 28”. Four-time award winner!
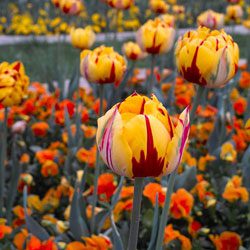
  • ‘La Courtine’ – A Scheepers hybrid, yellow flowers are oval-shaped, flamed with red from the bottom up, late-blooming, Ht: 26”.

With so many to choose from, it’s always time for tulips!

tulip-2tulip-3tulip-1

Devil’s Darning Needle

Fall is here and after hiding inside in the cool comfort of our air conditioning through the hottest, driest, buggiest time of the year, our interest in revisiting the outdoors is renewed. Reemerging from self-imposed exile into the garden, it is pure joy and a relief to witness the tenacity of late season bloomers that have had to bear, with no assistance or relief, the dog days of summer. One such plant, reliable and prolific, is Clematis virginiana, better known as Devil’s Darning Needle.

Devil’s Darning Needle – also called Devil’s Hair, Love Vine and Woodbine – is a North American native vine. It is very similar in habit and appearance to the Japanese native, Sweet Autumn Clematis (C. terniflora) that most of us are familiar with, yet Devil’s Darning Needle is not as aggressive and can be better controlled in the landscape. C. virginiana is a vigorous, twining, deciduous vine, growing about 15 feet in a season. This plant is in best form when planted next to a supporting structure such as an arbor, trellis, fence, tree or shrub. Its quick growth rate makes this an excellent choice where quick privacy is needed, such as along a fence, shielding a patio or forming a wall around a deck. If unsupported, it will sprawl along the ground.

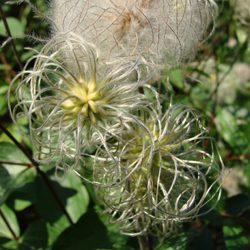
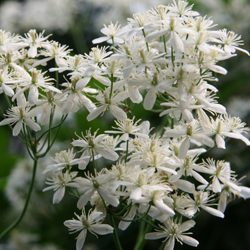
What makes this plant so alluring is its annual, overwhelming display of 1 and 1/4 inch, highly fragrant, star-shaped, pure white blossoms produced in billowy masses in the fall followed by ornamental, silvery, plume-like seed heads. Both flowers and seed heads work well in floral arrangements. Either in the yard or in a vase, this prolific bloomer will not disappoint.

Devil’s Darning Needle is easy to grow. As a low-maintenance vine, it is rarely troubled by pests or disease. It performs well in moist to wet soil of average fertility and prefers full sun to part shade, although it will thrive and bloom in considerable shade. Supplemental watering may be necessary during times of drought. In late winter or early spring, prune C. virginiana back hard to about one foot from the ground to encourage spring growth, but be certain to leave at least two strong buds on each stem. During the growing season, monitor the vine if it is growing through a shrub to make certain that the shrub is not being overwhelmed. No special care is needed to trim it back to control size, but it can be pruned for shape if desired.

Devil’s Darning Needle can be an amazing addition to your landscape, and its late summer and early fall beauty is sure to delight just when other plants begin to fade.

clematis_250x250_2clematis_250x250_1

Birdscaping

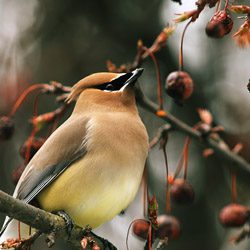
As development continues to threaten wildlife habitats, it is essential that we create a bird-friendly environment that provides food, water, and shelter. This will ensure the survival of many species of birds, as well as other wildlife. 

By providing these resources, we can help protect the biodiversity of our planet and create a more sustainable future for all living things. Additionally, creating a bird-friendly environment can also bring people closer to nature and help them connect with the natural world. Birds are an integral part of any healthy ecosystem, and their well-being is a barometer for the health of the overall environment.

So what do we mean by “birdscaping?” This is a term coined by Jan Johnson in her gardening book, Gardentopia, birdscaping is when you plant an array of berried plants in your yard so birds will stop by and feed on them—because berries are a necessary part of their diet. Birdscaping can also help your other plants, because birds will also feed on pests in your garden, like beetles and larvae, that would’ve otherwise caused harm to your blooms.

Benefits of Wild Birds

Birds are great guests to have in your yard, garden, or landscape. They provide more benefits than many homeowners and gardeners realize. 

Wild birds will…

  • Control insects by feasting on both flying and crawling insects, as well as spiders, slugs, snails, and other creepy crawlies.
  • Control rodents when raptors visit the yard in search of mice, rats, gophers, voles or other unwanted pests.
  • Manage weeds as they consume copious amounts of weed seeds before the seeds ever have a chance to sprout.
  • Pollinate plants by flitting from flower to flower as they seek out insects or eat seeds, taking pollen along between blooms.

Attracting Backyard Birds

Fortunately, it is easy to attract a wide variety of backyard birds when you offer them what they need most – food, water, and shelter.

Food for Birds

Wild birds rely on both natural and supplemental food supplies. So it’s important to consider both when birdscaping. Feeding the birds is most important in the winter when natural food is scarcer, but they will visit feeders at any time of year. Migratory birds require additional food in the spring and fall as they pass through the region and nesting birds will utilize feeders in the summer.

Tips:

  • Provide a variety of natural foods for birds by planting berry bushes, seed-bearing flowers, nectar-rich flowers, and sunflowers. 
  • Leave windfall fruit on the ground for birds to nibble. 
  • Minimize pesticide use so birds can feast on insects as well.
  • Add supplemental feeders to your yard, such as birdseed feeders, suet feeders, and nectar feeders. 
  • Clean feeders weekly to avoid mold that can be dangerous to birds, and be sure feeders are full when birds need them most.

Water

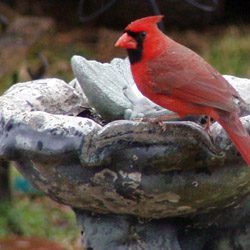
Improve your backyard bird habitat by adding water. Birds require a constant supply of clean water for drinking and bathing. This is especially important in late summer when water is scarce, and in the winter, when it is frequently frozen.

Tips:

  • Place bird baths in a protected location safe from predators, and keep the baths filled at all times so a fresh supply of water is constantly available.
  • Scrub off algae as soon as it appears and thoroughly wash the bird bath each week to minimize feces contamination or other messes in the water.
  • Provide motion for greater attraction by using a bubbler, wiggler, dripper, or fountain. Birds will see the sparkles of the moving water and will hear the splashes from great distances, so more birds will visit.
  • Use Mosquito Dunks to safely prevent mosquito larvae in warm weather. A clean bird bath with moving water will also harbor fewer insects.
  • Add an outdoor-safe submersible heater to the bath in winter to keep the water liquid instead of frozen, or consider using a fully heated bird bath during the coldest months.

Shelter

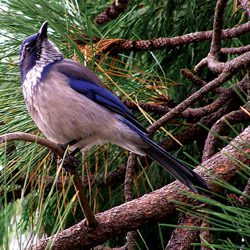
It is important to offer safe and comfortable shelter for your wild birds to nurture their young, protect them from predators and shield them from the elements. Planting evergreen trees and shrubs and providing birdhouses, along with roosting boxes and pockets, are all beneficial additions to your birdscape.

Tips:

  • Choose both deciduous and evergreen landscaping trees and shrubs to offer birds different types of shelter in all seasons.
  • Minimize pruning to give birds denser, more secure shelter to take advantage of when they feel threatened.
  • Plant in layers and create thicket-like pockets or corridors in your landscape so birds can move around freely without feeling exposed.
  • Supplement the shelter in your yard with good quality birdhouses, winter roost boxes, or nesting pockets to give birds even more options to stay safe and secure.

When you meet birds’ needs for food, water, and shelter, your birdscape will soon be home to a fun and friendly flock of backyard birds.

Birdscaping_3

Birdscaping_1

Birdscaping_2