Monthly Archives: November 2025

Cloches

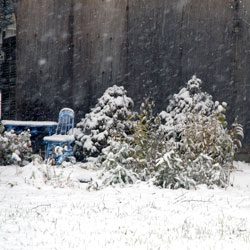
Back in the early ages of gardening, someone realized covering a plant could protect it from frost and wind chill, preserving blooms and protecting foliage from the ravages of ice crystals and dropping temperatures. In Victorian gardens and parlors, dome-shaped glass covers protected many tender and treasured plants from the nip of winter’s chill. Because of the resemblance to a close-fitting, bell-shaped woman’s hat, these protective devices were called cloches, the French word for hats. You’ve probably seen them over a plant in someone’s garden or greenhouse. Today, in addition to protecting plants and extending the growing season, they provide a touch of whimsy and romance for an elegant garden, terrarium or greenhouse.

Our gift store offers several sizes, materials and styles of cloches for garden use. The clear glass bell-shaped cloches are also popular for in-house decorating. Placed over a miniature orchid to enhance its growing environment or protecting a treasured arrangement, these gardening items show your trend setting and eclectic gardening style. They are ideal for specimen plants, or may be used to showcase a vintage vase, whimsical fairy garden, lush succulent arrangement or favorite potted plant. Even indoors, they provide protection to regulate the humidity and temperature near a plant, eliminating damaging drafts and helping keep delicate, temperamental plants happy.

Although the original cloches protected only one plant, the “cloche concept” now effectively extends the outdoor growing season for row crops. Modern technology and new materials make it easy to continue growing even after the temperatures drop. Hoops, tents and row covers protect late crops from frost and wind, extending the season and ensuring later harvests for the full richness of the fruits, vegetables, herbs and flowers that need just a bit of extra time to mature. Whether you hope to sell late season crops and want to improve your profit margin or would prefer a later harvest for extra canning and preservation, these tools can increase your season and improve your yields.

We have a large selection of protective materials including frost protection blankets, plastic row covers and curved hoops to hold the cloth above the plants without damaging produce or bruising leaves. Furthermore, if you want the growing season to never end at all, you can consider cold frames and miniature greenhouses that can keep your green thumb bright and active even on the coldest days. Come on in to see our complete selection, and keep on growing. 

cloches

Redbud Revelry

Gardeners love the Eastern redbud tree (Cercis canadensis). Native to North America, these hardy, slow-growing, small trees richly deserve their places front and center in the landscape. They flower very early in the spring (as early as April), provide beautiful fall color, remain reasonably small, are low maintenance and create quite a display when planted in groupings or as a single specimen. They even grow well in parking lots, sidewalk strips and in containers, making them ultimately versatile for all types of landscaping plans. What else could you ask for?

New and Exciting Redbud Varieties

As if the classic eastern redbud wasn’t beautiful enough, there are always new varieties that give these stunning trees even more charm and character. Which one will be the centerpiece of your landscape?

Recent introductions include ‘Lavender Twist’, which grows in an elegant weeping form, and the compact ‘Ace of Hearts’, which excels in a small garden or container as a blooming, dome-shaped, focal point. ‘Alba’ flowers in pure white and ‘Appalachian Red’ blooms with deep burgundy pink flowers. The leaves of ‘Hearts of Gold’ open red in the spring and slowly change to gold.

‘Rising Sun’ redbud, another new introduction, stops most people in their tracks. In spring, before leaves appear, lavender-pink pea-like flowers cover the trunk and branches. The show really starts when the leaves open and the heart-shaped, deep-apricot colored leaves transition through orange, yellow and gold to lime-green with all colors showing at the same time. In fall, the tree shimmers in shades of gold. Amazing!

Growing Your Redbud

No matter which type of redbud you choose, you’ll want to take good care of it to be sure it reaches its full beauty. First, be sure to plant your redbud in an area where it can stretch to its full size and show off the unique branching growth habit. You will also want to choose a position where the redbud won’t be crowded or overshadowed by other plants. These trees prefer at least four hours of direct, unfiltered sunlight each day, so full or partial sun positioning is best. These are hardy trees and grow well in most soil types, but adding organic material to the soil and mulching around the tree is always a wise idea to protect and nurture it.

Whether planted as a specimen, en masse, or in a container, we’re sure you’ll agree these little trees deserve consideration for a special place in your garden.

redbud_1 redbud_3

Japanese Beetle Reduction Methods

Japanese beetles can be a scourge of the garden and landscape, but what can you do to keep these pests at bay?

About Japanese Beetles

Japanese beetles (Popillia japonica) spend their early lives as underground grubs eating turf grass roots. They prefer well-watered, healthy perennial ryegrass and hard fescues in full sun. Emerging as adult beetles in mid-June through July, they begin feeding on over 200 varieties of plants, including shade and fruit trees, shrubs and ornamentals. They also mate and the females lay 50-70 eggs in the soil.

The eggs hatch in the fall and white C-shaped grubs begin eating roots. Autumn is the best time to check your lawn to see if the grubs are present. Dig several one-foot squares 6″ deep in your lawn, turning over the turf and looking for these distinctive grubs. If you find them, taking action immediately can help control the infestation.

Reducing Japanese Beetle Populations

Non-chemical preventative treatments include spraying beneficial nematodes such as Heterorhabditis or Steinernema onto moist lawns and soil in September. Nematodes, naturally occurring soil organisms, are parasitic to soil grubs and many insect larvae, including Japanese beetles. Spray in the evening and ensure the soil is moist to at least 6″ deep. One product, Lawn Guardian, contains two types of nematodes; one lives deeper in the ground to give a “double whammy” to the feeding grubs.

Natural predators include ground beetles, ants and Tiphia, a parasitoid. Applying Bacillus popilliae Dutky to the soil causes “Milky Spore Disease” to the grub. Chemicals to control the grubs include trichlorfon, imidacloprid, halofenozide or thiamethoxam, so look for pesticides that include these compounds to help eliminate Japanese beetles. Neem oil can also be helpful to control these pests. As always, read and follow the directions carefully when using any type of chemical pesticide.

In the garden, row covers can help minimize Japanese beetle populations during the growing season, but this can also reduce crop productivity as fewer flowers are pollinated. Still, if an area is heavily infested with Japanese beetles, a smaller crop may be a better alternative than accidentally nurturing these pests. If only a few beetles are present, hand-picking them off plants and killing and disposing of the insects – toss them in a bucket of soapy water – can keep the populations manageable.

For the latest information and updates on Japanese beetles, as well as more control tips, contact your favorite garden center or County Agent.

beetle_1JapaneseBeetle_2

Freshen Up for Fall

Transform summer garden pots, planters and window boxes into magical displays this fall. The addition of mums, winter pansies and ornamental cabbage and kale are always excellent choices but you can really spice things up with the inclusion of a few of these colorful, cold-hardy selections. Which ones will look best for your autumn landscape?

  • Acorus gramineus ‘Ogon’
    This graceful, fan-shaped acorus variety is ideal for adding height to plantings. It keeps its color and shape into the winter for visual interest as other plants lose their vibrancy.
  • Acorus gramineus ‘Variegatus’
    This is the white-variegated version of ‘Ogon’. Its white-green striping is the perfect complement to mixed planting in silver, pink, purple or blue, and its lightness adds freshness to the arrangement.
  • Ajuga reptans ‘Burgundy Glow’
    This ajuga has a trailing habit and pretty, variegated leaves. Its blue flowers are scattered in fall and summer but this plant blooms profusely in springtime.
  • Ajuga reptans ‘Mahogany’
    The rich mahogany color of the shiny, short-stemmed leaves turns darker and more lustrous in the winter, ideal in a frosted or snowy landscape. Pretty bright blue flowers punctuate this creeper, mostly in the spring.
  • Ceratostigma plumbaginoides ‘Leadwort’
    The prolific flowers of this plumbago are an intense gentian-blue and the foliage turns bright red in low temperatures, adding visual heat to the landscape even on cold days.
  • Euphorbia amydaloides ‘Purpurea’
    This pretty perennial is exceptionally frost resistant. ‘Purpurea’ features upright branches with leaves that form a rosette pattern and turn from reddish to purple in the cold.
  • Helichrysum thianschanicum ‘Icicles’
    Here’s an easy, fast-growing helichrysum variety with striking, velvety-silver leaves and a compact growth habit.
  • Lamiastru galeobdolon ‘Herman’s Pride’
    ‘Herman’s Pride’ has serrated, shiny silver leaves with green venation and yellow flowers in the spring. The plant trails as it grows, making it perfect as an accent in hanging baskets, taller containers and window boxes.
  • Lavendula lantata ‘Silver Leaf Lavender’
    This lavender variety has silvery-white leaves that are velvet-like to the touch and hold their color throughout the winter. Dark purple-blue flowers appear by the second year and contrast beautifully with the foliage.
  • Lysimachia nummularia ‘Goldilocks’
    Proven to do equally well in both sun and shade, ‘Goldilocks’ exhibits wonderful versatility. The golden foliage creeps and hangs in lush profusion of round, shiny leaves.
  • Salvia officinalis ‘Icterina’
    This sage has a glowing, golden-yellow variegated leaf. ‘Icterina’ maintains its shape and holds its color long into the winter.
  • Salvia officinalis ‘Purpurascens’
    The eggplant-colored leaves of this sage warm up any planting. Try it as a culinary herb as well and enjoy the subtle taste.
  • Salvia officinalis ‘Tricolor’
    ‘Tricolor’ offers a unique combination of purple leaves with white borders that turn pink when temperatures drop.

No matter which of these plants you opt for, you’ll enjoy the rich colors and variation they bring to your autumn plantings.

freshen-1

freshen-2

Bringing Your Tropical Plants Indoors for the Winter

As the summer comes to an end and autumn approaches, the days get shorter and cooler temperatures signal the time to ready your plants for winter. How can you protect your treasured tropicals from winter damage?

Overwintering Tropical Plants

Don’t wait until frost warnings or freezes occur to bring tropical plants inside, especially since these plants are more susceptible to dropping temperatures. Try to have all of your plants acclimated to the new indoor environment by the end of October. Avoid the temptation to move your tropicals back outside if it suddenly gets warm, because they will have to re-acclimate when you bring them back inside again. With a little extra care even exotic hibiscus can be over-wintered inside the house.

First, it’s a good idea to prune approximately one-eighth to one-fourth off the total height of the plant’s foliage. This helps reduce the shock that the plant receives with the change of conditions when bringing them indoors. Check the plants for signs of insects and treat them with insecticidal soap or pyrethrin spray as well as a systemic insecticide that will provide protection for up to six weeks.

Position indoor tropical plants in a very bright location that receives no less than 6 hours of light per day. If the winter is very cloudy, supplement your plants with an artificial light source. Be sure the room is warm, but avoid putting the plants too close to a heating vent, which can dry them out drastically.

Because they are tropical plants, they will need good humidity which can be achieved by using a humidity tray. Use a saucer that is at least 3-4 inches larger than the pot and fill it with an inch of stones. Pour water over the stones until they are half covered, then place the pot on top of the stones. The humidity immediately around the plant will be increased, but avoid setting the pot directly in any water, which can lead to fungus and rotting. Grouping several plants close together can also help them preserve humidity for more luxuriant growth.

Fertilizing should be continued throughout the winter, but at a rate of once per week. You will find the plant will not utilize as much water in the winter because its growth has slowed. Generally, plants should be watered every 4-7 days depending on location, pot size, soil type and plant type.

If you have any questions about winter care of your plants, our staff will be glad to help you keep your tropicals in good condition all winter long.

tropical-2

tropical-1

Get Started Composting

Fall is an excellent time to start a compost pile with all of the leaves falling, and if you develop compost now, you will have a rich source of organic material for your garden and flowerbeds in spring. Getting started with compost is fairly simple if you keep in mind the following…

  • Size Matters
    Smaller particles break down faster than larger chunks. Shredding or mulching garden wastes will help speed up the process and develop usable compost faster. Chop up larger pieces of household materials before adding them to your compost pile to speed up their decomposition.
  • Take a Turn for the Better
    Turning helps aerate the pile and shifts outer parts closer to the center where they can heat and decompose more effectively. A well-mixed pile will also have better consistency and more evenly distributed nutrients. Use a pitchfork, spade or rake to gently turn your pile periodically, such as once every 1-2 weeks or whenever you add a large amount of new material to the pile.
  • Know What to Compost
    Materials that can be composted are sod, grass clippings, leaves, hay, straw, manure, chopped corncobs, corn stalks, sawdust, shredded newspaper, wood ashes, hedge clippings and many kinds of plant refuse from the garden. Some household waste, such as coffee grounds, banana peels, eggshells and vegetable peelings are also ideal for a compost pile and will reduce the trash you accumulate.
  • Avoid Unwanted Materials
    Materials to avoid composting are large amounts of weeds, grease, fat, meat scraps and bones, cheese, coal ashes, diseased plants, cut weeds and charcoal. These materials do not decompose readily and can create poor quality compost. For example, meat, grease or dairy products in your compost will begin to smell strongly, which could attract rats, raccoons or other unwanted visitors. Diseased plants or weeds can survive in a compost pile, contaminating your garden when you add the compost to the soil in spring.
  • Cover as Needed
    Covering your compost pile with a tarp or large piece of carpet can help preserve the heat and moisture essential to promote appropriate decomposition. The cover can also keep the pile from freezing or getting too wet in winter conditions, and it can easily be removed to add new material or turn the pile as needed.

Before you toss out your next bag of trash, check for compost material and start your pile today! Your garden will thank you tomorrow.

compost_2

compost_1

Gardener Holding Tree Bark Mulch

Holiday Tree for the Birds

Celebrate the season with your feathered friends by decorating a tree in your yard, or even one in a container, with special treats they’ll love.

Bird-Friendly Ornaments

There are several types of delicious “ornaments” birds will love, and they can be fun, easy projects to brighten up a winter day.

  • Pine Cone Feeders
    Pine cones are easy to turn into impromptu bird feeders. Gather some pine or spruce cones. Tie a loop of twine or colorful holiday yarn around the top to use as a hanger. Fill the crevices with peanut butter, then roll in bird seed or cornmeal.
  • Orange Halves
    Don’t toss out that orange rind – turn it into a bird feeder! Fill scooped out orange halves with a mixture of peanut butter, suet and seed. Poke a length of wire, yarn or twine through the top to attach to the tree. Coconut halves are another great option.
  • Bird Cakes and Muffins
    Make “bird cakes” to set in the branches: Melt 2 cups of suet in a saucepan. Mix in 2 cups of peanut butter and several cups of cornmeal, until the mixture is soft but not too sticky. Spoon mixture into muffin cups and decorate with black oil sunflower seed. Cool before using.

Great Garlands

What’s a holiday tree without garland? To make a bird-friendly, edible decoration, string unsalted, unbuttered popcorn on lengths of heavy-duty thread, twine or yard (avoid fishing line that birds can get tangled in too easily). For more color and variety, add whole peanuts, cranberries, grapes and raisins to the garland as well, or even a few loops of whole grain, unsweetened cereal such as plain Cheerios. You can even include other dried fruits, but avoid any seasoned or sweetened options (those foods aren’t good for birds). Weave your edible garland among the branches.

And Lastly, the Tree Topper!

Top your bird-friendly feeder tree with a grapefruit “star” the birds will love. Slice the ends off a grapefruit, leaving a 1″ slice in the middle (use the ends to fill with seed or peanut butter mixture, a larger version of the filled orange halves). Wire 5 cranberries around the edge of the slice to form the points of a star, trimming away the excess rind in between if desired. Then, wire the whole thing to the top of your tree.

Now stand back and watch as your feathered friends enjoy their holiday feast!

bird_tree_2bird_tree_3bird_tree_1

Winter Silhouettes

Winter provides us the opportunity to examine our landscape silhouette, the flowing lines and overall shape of our landscape design. Combining varying heights, shapes and forms not only increases winter interest, but it also provides the framework for summer leaves, flowers and colors. So, how’s your garden’s silhouette shaping up?

Trees, Trees, Trees

Trees are the backbone of your landscape and are noticeable in every season. When flowers have faded and foliage has fallen, it is the trees that will be the stars of the show. If your winter landscape is lacking interest, here are some ideas for small to medium trees to provide winter texture and variety. If it’s too late (or too cold!) to plant now, consider the placement of one or more of our suggestions to incorporate after the big thaw.

  • Harry Lauder’s Walking Stick (Corylus avellana ‘Contorta’): This long-time favorite slowly grows to 8′ tall and wide. With drooping, twisty branches, this small tree is perfect in a large container, as a focal point or as a specimen in a small garden. Golden hanging catkins often persist through the winter. The contorted twigs and branches provide interest in flower arrangements.
  • Curly Willow (Salix matsudana ‘Tortuosa’): This upright rounded tree with curly twigs and branches grows to 30′ tall by 20′ wide, ideal for larger yards or bigger spaces. The twisted twigs, when encased in ice, bounce the sunlight around. When painted with metallic paint or shades of white, cut branches add interest to flower arrangements.
  • Paper Bark Maple (Acer griseum): This tree slowly grows to a gracefully shaped 15-30′ tall oval tree. Additional winter beauty is from its rich red to cinnamon-brown peeling and curling bark, which draws the eye both for its color and its texture. It’s simply beautiful against a snowy white background.
  • Weeping Cherry (Prunus subhirtella varieties): The fountain-like “weeping” form with slender drooping twigs casts fascinating shadows with its silhouette. Covered with a light dusting of snow or encased in ice, it looks like a sparkling Victorian chandelier and is an elegant focal point in the yard or flowerbed.
  • Slender Silhouette Sweetgum (Liquidambar styraciflua ‘Slender Silhouette’): A columnar variety of an American native, this tall and slender introduction grows to 40′ tall by 5′ wide, perfect for adding strong vertical pop to punctuate the winter garden. This is ideal for narrow spaces or smaller yards.

Of course, our helpful staff is here to answer any questions and offer landscaping suggestions tailored to your specific needs. There is no reason your landscape silhouette needs to fade into nothingness when winter arrives – we have the right trees for you!

silhouette-1silhouette-2

Holiday Poinsettia Care

A poinsettia plant is the quintessential holiday decoration and hostess gift for holiday parties or visits. They’re great as a centerpiece, decorating a step or filling in any empty space with bold holiday color and cheer. You can even position multiple poinsettias into elaborate arrangements mimicking trees or other holiday shapes. Have a look at our poinsettia do’s and don’ts list to help keep your poinsettia lush and beautiful through the holidays and beyond.

  • DO place your plant in indirect sunlight for at least six hours per day. If direct sun can’t be avoided, diffuse the light with a shade or sheer curtain to prevent burns that can discolor the bracts or dry the plant out too quickly.
  • DO provide room temperatures between 68-70° Fahrenheit. Generally, if you are comfortable, so is your poinsettia. Cooler (but not cold!) temperatures will be better than hotter areas, but you must avoid sudden chills.
  • DO water your plant when the soil feels dry to the touch. Use distilled water without any chemicals or additives. If you must use tap water, allow it to stand for 24 hours before watering so chemicals can evaporate out of the water.
  • DO fertilize your plant after the blooming season with a balanced, all-purpose fertilizer if you hope to keep the plant thriving for many weeks. Use fertilizer properly according to the manufacturer’s instructions.
  • DON’T place plants near cold drafts or excessive heat. Avoid placing plants near appliances, fireplaces or air ducts, and minimize ceiling fan use or other drafts and breezes near the plant. Don’t place poinsettias near exterior doors that are opened and closed frequently.
  • DON’T expose plants to temperatures below 50° Fahrenheit. Poinsettias are sensitive to cold, so do not place them outside during the winter months.
  • DON’T overwater your plant or allow it to sit in standing water. Always remove a plant from any decorative container before watering so you can carefully gauge the water it receives, and allow any excess water to drain completely to minimize the risk of root rot.
  • DON’T expose your plant to chilling winds when transporting it. Use the plant sleeve provided when you purchased the plant. If you will be giving the plant as a gift, wrap it lightly with tissue when transporting it.
  • DON’T fertilize your plant when it is in bloom. After blooming, use the appropriate fertilizer and follow instructions carefully to provide your poinsettia with the proper nutrition.
  • DON’T give up on your poinsettia! These plants can be stunning for many weeks after Christmas, and with proper care you can enjoy your poinsettia for long after the holiday season.