Author Archives: Dill's Greenhouse

Feeding the Birds

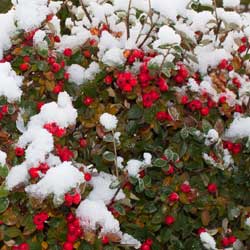
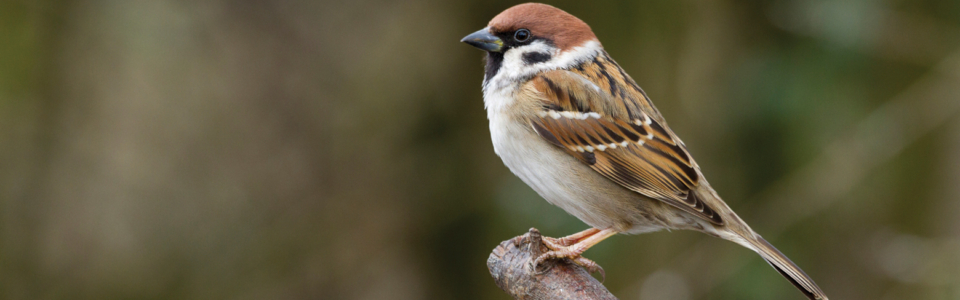
When a bird’s natural plant food has waned or withered away in late winter, a few well-placed feeders can entice a feathered friend to stay nearby. There are four basic types of feeders, but the type of feeder and food it’s filled with will determine which birds will visit. Which do you want in your yard?

Feeder Types and the Birds They Attract

While birds will visit a variety of different feeders, the best options for winter birds are…

  • Tray / Platform Feeders
    A tray or platform feeder with low sides and a wide, open base placed one to three feet above the ground will lure ground-feeding birds like juncos, towhees and mourning doves. Grouse and quail may also visit this type of feeder, and these feeders are ideal for offering food to large flocks of birds.
  • House Hopper Feeders
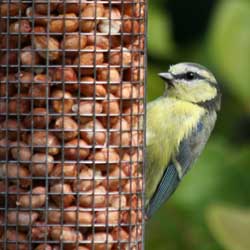
    Hung from a tree or hook or mounted on a pole, “house” style feeders with seed hoppers and perches on the side will usually entice grosbeaks, cardinals and jays, as well as sparrows and finches. These feeders help keep seed dry and can hold a larger quantity of seed so refills are not as frequent.
  • Tube Feeders
    Long, cylindrical tube feeders suspended in air will bring in an array of small birds, including finches, titmice, nuthatches, siskins, redpolls and chickadees. These feeders may have either mesh-like sides where birds can easily cling, or they may have multiple perches to accommodate more birds. Sock-style feeders are also popular.
  • Suet Feeders
    A cage-like feeder that holds a cake of rich, fatty suet is a bird magnet for woodpeckers, wrens, titmice, nuthatches, titmice, mockingbirds and jays. A standard suet cage can hold just one cake and can be hung from a pole or branch. Larger suet feeders may hold multiple cakes, and some suet feeders are even designed as logs or other shapes to hold suet plugs or balls.

Best Winter Bird Foods

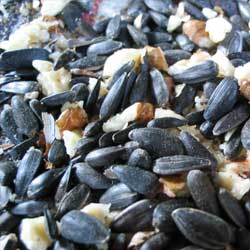
Birds will seldom drop or pick out unwanted seeds if you fill your feeder with only one type of seed rather than a generic mix. Black oil sunflower seeds are the most widely preferred, though white millet is popular for smaller finches, sparrows and ground-feeding birds. A tube feeder containing Nyjer (thistle) seeds will whet the appetite of goldfinches, siskins or redpolls. Jays, chickadees and juncos love peanuts or cracked corn as a treat in a tray feeder. Suet is another fine treat that offers great calories to keep winter birds healthy.

No matter which type of bird feeder you offer or how you fill it, you are sure to enjoy the company of a hungry winter flock. Keep the feeder filled and clean, and the birds will continue to visit all winter long.

Caring for Forced Bulbs

Potted tulips, crocus, hyacinths and daffodils add color to dull, dreary winter months. With proper care, these spring treasures can give you weeks of enjoyment long before their outdoor cousins poke through the soil, bringing a burst of color and life to your home even when winter is in full force. Stop by our greenhouse today and pick up some forced bulbs to brighten your home!

To Care for Forced Bulbs

While outdoor bulbs require are remarkably low-maintenance and will return year after year looking better than ever, forced bulbs take some extra care to keep looking their best while they’re in bloom. To make the most of your forced bulbs… 

  • Soil should be kept moist, but not wet. Do not allow the plants to stand in excess water, as this can cause rot that will destroy the plant. Be sure soil has proper drainage to keep excess water away from the roots.
  • Place the plants in indirect light and keep them as cool as possible. The cooler the temperature, the longer the bloom period will be. Ideal temperatures are 55-60 degrees during the day and 40-50 degrees at night. The pot may be kept in the refrigerator at night if necessary, or move it to an unheated garage or basement to chill out overnight. Placing pots near a window and away from heating vents can help keep them cooler.
  • When the flowers fade, cut off the flower stems near the soil level. Take care not to cut into the bulb, however, as the damage could impact any future blooming. Do not cut away foliage – it will continue to add nutrition to the bulb’s storage. Instead, allow the foliage to remain intact until it withers naturally, whether it is still in a pot or has been planted outdoors before wilting.
  • Bulbs cannot typically be forced indoors a second time. Instead, transplant the bulbs into the garden in the spring with a handful of bone meal in the hole and in a suitable location and soil type for the flower. Allow the foliage at least 6-8 weeks in the ground to gather energy for next spring.

Many forced bulbs will not rebloom immediately when planted outdoors, but with patience and good care, they may recover from being forced and could become an integral part of your spring landscape just as they were part of your indoor landscape in winter.

caring-forced

Anti-Desiccants: Why, What, and When

You’ve removed late-autumn weeds, layered on the mulch, pruned appropriately, possibly even covered or wrapped your plants – so why do some still die in the winter, despite all your well-meaning efforts?

Many plants die during winter because they dry out, or desiccate. As temperatures drop, the ground freezes and plant roots cannot take water from the soil, no matter how much snow may fall. This causes the plant to use stored water from the leaves and stems as part of the transpiration process, during which water exits the plant through the leaves. If the sun is shining or the wind is blowing, transpiration increases and more water exits the leaves. If no water is available and transpiration continues, the plant will soon die. Because evergreen plants do not drop their leaves, they are especially susceptible to this death.

Preventing Desiccation

How can you help your plants stay well-hydrated through the frozen drought of winter? The first step is to remember healthy plants in the summer survive the hardships of winter far better than sickly or stressed plants. Through the spring, summer and fall, you should always be on the lookout for signs of pests, diseases and damage, and take all necessary steps to keep your plants thriving.

Second, be sure to water well even when temperatures begin dropping below freezing. Later, if the ground thaws, water before the ground refreezes. Water slowly to provide a deep drink without waterlogging the roots, however, so they are not damaged by ice.

The third step is to use an anti-desiccant, also called an anti-transpirant, to reduce the moisture loss from the leaves and needles. Because broadleaf evergreens such as boxwood, aucuba, holly, rhododendron, many laurels, Japanese skimmia and leucothoe do not drop their leaves, they are especially vulnerable to winter death. Using a product such as Wilt-Pruf to reduce transpiration by protecting the pores will save many broadleaf evergreens.

When using any horticultural product, be sure to check the label and follow all instructions properly. Some conifers such as cedar, cypress, juniper and pine may benefit from these products. However, be sure to read the instructions to prevent burning specific conifers. Also, do not use on “waxy” blue conifers, such as blue spruce, which already have an oily protective film on the nettles.

Here are a few reminders to get the best protection from an anti-desiccant:

  • Plan to apply when day temperatures begin dropping below 50⁰ Fahrenheit. Apply when temperatures are above freezing on a dry day with no rain or snow anticipated within 24 hours. This allows the product to thoroughly dry. Spraying in freezing temperatures will cause plant damage.
  • Do not spray conifers until thoroughly dormant, generally in late winter. This prevents trapping moisture in the needles which could burst when frozen.
  • Generously apply to dry leaves and needles. Don’t forget the undersides. Spray from several angles to ensure complete coverage.
  • Because the anti-desiccant will break down in light and warmth, reapply in late winter on a dry day when temperatures are above freezing for at least 24 hours.

Beyond Winter Drought

Other than protecting your landscape evergreens from winter drought, there are other uses for anti-desiccants. Many gardeners use it to protect newly transplanted shrubs from drying winds and sunshine as they settle in. It also provides protection to tender bulbs going into storage. A quick spray in early winter protects rose canes and hydrangea stems. Spraying onto live or cut Christmas trees and carved pumpkins slows the drying process, making them last longer for greater holiday enjoyment.

To answer your questions, or to choose the best product for your landscape plants, come in to discuss anti-desiccants with one of our friendly and knowledgeable staff members. Together, we can reduce the number of plants you lose to the dryness of winter and keep your garden beautiful and healthy.

AntiDesiccant_1AntiDesiccant_2AntiDesiccant_3

Reaching New Heights with Tall Perennials

Did your garden seem to come up short last year? Were there areas where some height could have added excitement, texture and pizzazz to your landscape? If so, grab your garden journal and make some notes! We have an excellent list of perennials coming this spring and it’s sure to include the colors, heights and types of plants to add a vertical punch to your garden. Our top picks include…

PerennialChart

Of course, this is just a partial listing of taller perennials available in the coming months. Delivery trucks filled with beautiful, healthy and vibrant plants arrive nearly every day. Make your wish-list and come on in to see us on a regular basis. That way, you’ll have the best selection of our incoming beauties and can choose the perfect tall plants to add a vertical lift to your garden

NewHeights_1

Getting Tools Ready for Spring

Did you clean, sharpen and store your gardening tools properly last fall when you stopped gardening?

Hopefully, you did, but if you didn’t, it’s not too late. Spring is just around the corner, but there’s still time to get these essential chores done and be ready to jump in to all your gardening and landscape work when spring arrives.

  • Assemble Your Tools
    Round up the shovels, hoes, rakes and picks. Gather the hand tools such as pruners, loppers, saws, cultivators, weeders and all those little special gadgets you use. If they are all in one place, you can clean and care for them assembly-line style to make the task easier and less overwhelming.
  • Washing Tools
    Fill a bucket or sink with sudsy water. Combine some elbow grease with some rags, a stiff wire brush, steel wool and small toothbrush and wash off all accumulated mud and dirt. Remove sap from pruners and loppers using rubbing alcohol, turpentine, paint thinner or other solvent. Be sure to clean the handles. Towel dry each tool carefully.
  • Handle Care
    How do the wooden handles look and feel? To prevent splinters, lightly sand and apply a protective coating of boiled linseed oil. (Boiled, not raw, as raw won’t dry.) This is also a good time to apply brightly colored rubberized paint to hand tool handles. Not only will this improve the grip but makes it easier to find the tools when Ieft in the garden. If any handles are so worn or damaged that they need to be completely replaced, this is a good time to do so.
  • Remove Rust
    Get the rust off using sandpaper, steel wool and/or a wire brush. For difficult rust, you may need to attach a wire wheel to your drill. Safety googles are necessary eye protection when using a power tool for cleaning. Afterwards, coat the metal with a thin layer of oil such as WD-40, machine or 3-in-One oil to prevent new rust from forming.
  • TIP: To prevent rust, make an “oil bucket” and keep where you store your tools.
    • Half-fill a 5-gallon bucket with coarse sand such as builder’s sand
    • Pour in a quart of oil (used motor oil is fine)
    • Mix until all of the sand is lightly moistened
    • After using a garden tool, plunge the tool into the bucket several times to thoroughly remove soil and thinly coat the metal surface with oil
  • Sharpen Blades and Edges
    Check the edges and moving parts of the tools. To sharpen shovels, spades and hoes, fasten in a vise and use a hand file to restore the same original bevel angle, usually between 40-70 degrees. Use a fine grit grinding stone along the back edge of the tool to remove the burr created by the file. Wipe the metal surface with machine oil. Don’t forget to sharpen hand pruners and loppers as well, and use machine oil to lubricate the moving parts of different tools. Note: If you aren’t equipped to sharpen your tools yourself, take them to an appropriate expert to be sure they’re sharpened safely and correctly.
  • Check Tool Storage
    Now that you tools are ready for work, where will you keep them until spring arrives? Check hooks, stands, toolboxes and other gear where you keep your tools and be sure they are stored safely and securely while still being easy to find and reach whenever you need them.

Now, you – and your tools – are ready for spring. 

ToolsReadyforSpring_1ToolsReadyforSpring_2

ToolsReadyforSpring_3

ToolsReadyforSpring_4

Decorating Your Home With Houseplants

Bring the bright atmosphere of a tropical vacation into your home this winter with houseplants. An integral part of your home décor, houseplants not only artistically improve your home, they also cleanse and freshen your indoor air quality. Plants take in carbon dioxide and release clean, pure oxygen. Some plants even absorb certain air toxins, potentially harmful radiation or unpleasant smells. Houseplants also add welcome humidity to the air we breathe, and filter dust particles for a cleaner environment. While houseplants can improve your life in many ways, they must be selected to fit successfully into your lifestyle.

Don’t Consider Light Lightly

When selecting a foliage plant, first determine what type of light you have – this will be the best key to the plant’s health and survival. Look at the area where you would like to keep the plant through the entire day to determine if the light changes. You will also want to keep in mind the time of year – the light will change with different seasons as well as the angle of the sun. 

  • Low Light – 3-4 hours of indirect light. Don’t confuse this type of light with no light. If you can sit in the room and read comfortably without turning on a light, it is low light. If you must turn a light on, then it’s considered no light.
  • Medium Light – 4-6 hours of indirect or direct morning sun.
  • High Light – Direct or indirect sun for 6-8 hours a day. Direct afternoon sun in the winter can be too hot for many houseplants. Be careful this time of year because many plants can get sunscald.

No matter what the light levels in different rooms of your home, there are plants that can be comfortable there. If you aren’t sure what your light may be or which plants may thrive, we also recommend you talk to one of our experts about your particular situation for best results.

Low Light Plants

  • Aglaonema
  • Dracaena Warneckii
  • Homolomena
  • Dracaena Janet Craig
  • Pothos
  • Philodendron
  • Spathiphyllum
  • Philodendron Xanadu

Medium Light Plants

  • Corn Plant
  • Norfolk Island Pine
  • Bamboo Palm
  • Ming Aralia
  • Podocarpus
  • Schefflera Amate
  • Spathiphyllum Domino
  • Arboricola
  • Anthirium
  • Ficus Alii
  • Lubersii

High Light Plants

  • Palms
  • Yucca Cane
  • Sago Palm
  • Crotons
  • Fishtail Palm
  • Banana
  • Zamia

A Word About Watering

The smaller the pot, the more frequently you will need to water your houseplant. Small pots (2-3 inches) might need water every day depending on the plant’s needs and the richness of the soil. A 4-6 inch pot may need water every 3-4 days, whereas a 10-inch pot (or larger) usually only requires water every 4-6 days. These guidelines can change depending upon the location of the plant, the type of pot, variety of plant, soil condition, general humidity, time of year and weather conditions. Plants don’t utilize as much moisture on gray days as they do on sunny days.

Because so many factors can impact houseplant watering, determining the watering schedule for large pots (over 10 inches) can be difficult. To help, take a natural wooden dowel and push it into the soil until it reaches the bottom of the pot. After you pull the dowel out, you will be able to see the wetness on the bottom of the stick (if there is any). Also, remember that the larger the pot, the more water will be held in the soil at the bottom – even if there are drainage holes.

Fertilizing

Most foliage or non-flowering houseplants prefer 20-20-20 fertilizer once a month, year-round. You can increase the feeding to twice a month during the growing season. Flowering plants have different fertilizing needs depending on their bloom schedules and growth productivity. Investigate the needs of your individual plants and feed them appropriately.

Houseplants can add great beauty and many benefits to your home. Once you begin choosing houseplants, you’ll soon be enjoying them in every room and every season.

Cloches

Back in the early ages of gardening, someone realized covering a plant could protect it from frost and wind chill, preserving blooms and protecting foliage from the ravages of ice crystals and dropping temperatures. In Victorian gardens and parlors, dome-shaped glass covers protected many tender and treasured plants from the nip of winter’s chill. Because of the resemblance to a close-fitting, bell-shaped woman’s hat, these protective devices were called cloches, the French word for hats. You’ve probably seen them over a plant in someone’s garden or greenhouse. Today, in addition to protecting plants and extending the growing season, they provide a touch of whimsy and romance for an elegant garden, terrarium or greenhouse.

Our gift store offers several sizes, materials and styles of cloches for garden use. The clear glass bell-shaped cloches are also popular for in-house decorating. Placed over a miniature orchid to enhance its growing environment or protecting a treasured arrangement, these gardening items show your trend setting and eclectic gardening style. They are ideal for specimen plants, or may be used to showcase a vintage vase, whimsical fairy garden, lush succulent arrangement or favorite potted plant. Even indoors, they provide protection to regulate the humidity and temperature near a plant, eliminating damaging drafts and helping keep delicate, temperamental plants happy.

Although the original cloches protected only one plant, the “cloche concept” now effectively extends the outdoor growing season for row crops. Modern technology and new materials make it easy to continue growing even after the temperatures drop. Hoops, tents and row covers protect late crops from frost and wind, extending the season and ensuring later harvests for the full richness of the fruits, vegetables, herbs and flowers that need just a bit of extra time to mature. Whether you hope to sell late season crops and want to improve your profit margin or would prefer a later harvest for extra canning and preservation, these tools can increase your season and improve your yields.

We have a large selection of protective materials including frost protection blankets, plastic row covers and curved hoops to hold the cloth above the plants without damaging produce or bruising leaves. Furthermore, if you want the growing season to never end at all, you can consider cold frames and miniature greenhouses that can keep your green thumb bright and active even on the coldest days. Come on in to see our complete selection, and keep on growing. 

cloches

Redbud Revelry

Gardeners love the Eastern redbud tree (Cercis canadensis). Native to North America, these hardy, slow-growing, small trees richly deserve their places front and center in the landscape. They flower very early in the spring (as early as April), provide beautiful fall color, remain reasonably small, are low maintenance and create quite a display when planted in groupings or as a single specimen. They even grow well in parking lots, sidewalk strips and in containers, making them ultimately versatile for all types of landscaping plans. What else could you ask for?

New and Exciting Redbud Varieties

As if the classic eastern redbud wasn’t beautiful enough, there are always new varieties that give these stunning trees even more charm and character. Which one will be the centerpiece of your landscape?

Recent introductions include ‘Lavender Twist’, which grows in an elegant weeping form, and the compact ‘Ace of Hearts’, which excels in a small garden or container as a blooming, dome-shaped, focal point. ‘Alba’ flowers in pure white and ‘Appalachian Red’ blooms with deep burgundy pink flowers. The leaves of ‘Hearts of Gold’ open red in the spring and slowly change to gold.

‘Rising Sun’ redbud, another new introduction, stops most people in their tracks. In spring, before leaves appear, lavender-pink pea-like flowers cover the trunk and branches. The show really starts when the leaves open and the heart-shaped, deep-apricot colored leaves transition through orange, yellow and gold to lime-green with all colors showing at the same time. In fall, the tree shimmers in shades of gold. Amazing!

Growing Your Redbud

No matter which type of redbud you choose, you’ll want to take good care of it to be sure it reaches its full beauty. First, be sure to plant your redbud in an area where it can stretch to its full size and show off the unique branching growth habit. You will also want to choose a position where the redbud won’t be crowded or overshadowed by other plants. These trees prefer at least four hours of direct, unfiltered sunlight each day, so full or partial sun positioning is best. These are hardy trees and grow well in most soil types, but adding organic material to the soil and mulching around the tree is always a wise idea to protect and nurture it.

Whether planted as a specimen, en masse, or in a container, we’re sure you’ll agree these little trees deserve consideration for a special place in your garden.

redbud_1 redbud_3

Japanese Beetle Reduction Methods

Japanese beetles can be a scourge of the garden and landscape, but what can you do to keep these pests at bay?

About Japanese Beetles

Japanese beetles (Popillia japonica) spend their early lives as underground grubs eating turf grass roots. They prefer well-watered, healthy perennial ryegrass and hard fescues in full sun. Emerging as adult beetles in mid-June through July, they begin feeding on over 200 varieties of plants, including shade and fruit trees, shrubs and ornamentals. They also mate and the females lay 50-70 eggs in the soil.

The eggs hatch in the fall and white C-shaped grubs begin eating roots. Autumn is the best time to check your lawn to see if the grubs are present. Dig several one-foot squares 6″ deep in your lawn, turning over the turf and looking for these distinctive grubs. If you find them, taking action immediately can help control the infestation.

Reducing Japanese Beetle Populations

Non-chemical preventative treatments include spraying beneficial nematodes such as Heterorhabditis or Steinernema onto moist lawns and soil in September. Nematodes, naturally occurring soil organisms, are parasitic to soil grubs and many insect larvae, including Japanese beetles. Spray in the evening and ensure the soil is moist to at least 6″ deep. One product, Lawn Guardian, contains two types of nematodes; one lives deeper in the ground to give a “double whammy” to the feeding grubs.

Natural predators include ground beetles, ants and Tiphia, a parasitoid. Applying Bacillus popilliae Dutky to the soil causes “Milky Spore Disease” to the grub. Chemicals to control the grubs include trichlorfon, imidacloprid, halofenozide or thiamethoxam, so look for pesticides that include these compounds to help eliminate Japanese beetles. Neem oil can also be helpful to control these pests. As always, read and follow the directions carefully when using any type of chemical pesticide.

In the garden, row covers can help minimize Japanese beetle populations during the growing season, but this can also reduce crop productivity as fewer flowers are pollinated. Still, if an area is heavily infested with Japanese beetles, a smaller crop may be a better alternative than accidentally nurturing these pests. If only a few beetles are present, hand-picking them off plants and killing and disposing of the insects – toss them in a bucket of soapy water – can keep the populations manageable.

For the latest information and updates on Japanese beetles, as well as more control tips, contact your favorite garden center or County Agent.

beetle_1JapaneseBeetle_2

Freshen Up for Fall

Transform summer garden pots, planters and window boxes into magical displays this fall. The addition of mums, winter pansies and ornamental cabbage and kale are always excellent choices but you can really spice things up with the inclusion of a few of these colorful, cold-hardy selections. Which ones will look best for your autumn landscape?

  • Acorus gramineus ‘Ogon’
    This graceful, fan-shaped acorus variety is ideal for adding height to plantings. It keeps its color and shape into the winter for visual interest as other plants lose their vibrancy.
  • Acorus gramineus ‘Variegatus’
    This is the white-variegated version of ‘Ogon’. Its white-green striping is the perfect complement to mixed planting in silver, pink, purple or blue, and its lightness adds freshness to the arrangement.
  • Ajuga reptans ‘Burgundy Glow’
    This ajuga has a trailing habit and pretty, variegated leaves. Its blue flowers are scattered in fall and summer but this plant blooms profusely in springtime.
  • Ajuga reptans ‘Mahogany’
    The rich mahogany color of the shiny, short-stemmed leaves turns darker and more lustrous in the winter, ideal in a frosted or snowy landscape. Pretty bright blue flowers punctuate this creeper, mostly in the spring.
  • Ceratostigma plumbaginoides ‘Leadwort’
    The prolific flowers of this plumbago are an intense gentian-blue and the foliage turns bright red in low temperatures, adding visual heat to the landscape even on cold days.
  • Euphorbia amydaloides ‘Purpurea’
    This pretty perennial is exceptionally frost resistant. ‘Purpurea’ features upright branches with leaves that form a rosette pattern and turn from reddish to purple in the cold.
  • Helichrysum thianschanicum ‘Icicles’
    Here’s an easy, fast-growing helichrysum variety with striking, velvety-silver leaves and a compact growth habit.
  • Lamiastru galeobdolon ‘Herman’s Pride’
    ‘Herman’s Pride’ has serrated, shiny silver leaves with green venation and yellow flowers in the spring. The plant trails as it grows, making it perfect as an accent in hanging baskets, taller containers and window boxes.
  • Lavendula lantata ‘Silver Leaf Lavender’
    This lavender variety has silvery-white leaves that are velvet-like to the touch and hold their color throughout the winter. Dark purple-blue flowers appear by the second year and contrast beautifully with the foliage.
  • Lysimachia nummularia ‘Goldilocks’
    Proven to do equally well in both sun and shade, ‘Goldilocks’ exhibits wonderful versatility. The golden foliage creeps and hangs in lush profusion of round, shiny leaves.
  • Salvia officinalis ‘Icterina’
    This sage has a glowing, golden-yellow variegated leaf. ‘Icterina’ maintains its shape and holds its color long into the winter.
  • Salvia officinalis ‘Purpurascens’
    The eggplant-colored leaves of this sage warm up any planting. Try it as a culinary herb as well and enjoy the subtle taste.
  • Salvia officinalis ‘Tricolor’
    ‘Tricolor’ offers a unique combination of purple leaves with white borders that turn pink when temperatures drop.

No matter which of these plants you opt for, you’ll enjoy the rich colors and variation they bring to your autumn plantings.

freshen-1

freshen-2