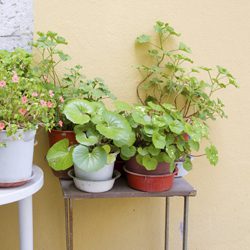
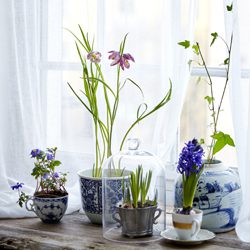
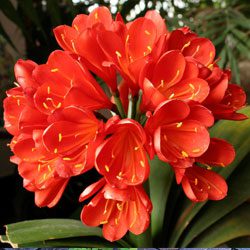
Author Archives: Dill's Greenhouse

Bringing Your Tropical Plants Indoors for the Winter

As the summer comes to an end and autumn approaches, the days get shorter and cooler temperatures signal the time to ready your plants for winter. How can you protect your treasured tropicals from winter damage?

Overwintering Tropical Plants

Don’t wait until frost warnings or freezes occur to bring tropical plants inside, especially since these plants are more susceptible to dropping temperatures. Try to have all of your plants acclimated to the new indoor environment by the end of October. Avoid the temptation to move your tropicals back outside if it suddenly gets warm, because they will have to re-acclimate when you bring them back inside again. With a little extra care even exotic hibiscus can be over-wintered inside the house.

First, it’s a good idea to prune approximately one-eighth to one-fourth off the total height of the plant’s foliage. This helps reduce the shock that the plant receives with the change of conditions when bringing them indoors. Check the plants for signs of insects and treat them with insecticidal soap or pyrethrin spray as well as a systemic insecticide that will provide protection for up to six weeks.

Position indoor tropical plants in a very bright location that receives no less than 6 hours of light per day. If the winter is very cloudy, supplement your plants with an artificial light source. Be sure the room is warm, but avoid putting the plants too close to a heating vent, which can dry them out drastically.

Because they are tropical plants, they will need good humidity which can be achieved by using a humidity tray. Use a saucer that is at least 3-4 inches larger than the pot and fill it with an inch of stones. Pour water over the stones until they are half covered, then place the pot on top of the stones. The humidity immediately around the plant will be increased, but avoid setting the pot directly in any water, which can lead to fungus and rotting. Grouping several plants close together can also help them preserve humidity for more luxuriant growth.

Fertilizing should be continued throughout the winter, but at a rate of once per week. You will find the plant will not utilize as much water in the winter because its growth has slowed. Generally, plants should be watered every 4-7 days depending on location, pot size, soil type and plant type.

If you have any questions about winter care of your plants, our staff will be glad to help you keep your tropicals in good condition all winter long.

tropical-2

tropical-1

Get Started Composting

Fall is an excellent time to start a compost pile with all of the leaves falling, and if you develop compost now, you will have a rich source of organic material for your garden and flowerbeds in spring. Getting started with compost is fairly simple if you keep in mind the following…

  • Size Matters
    Smaller particles break down faster than larger chunks. Shredding or mulching garden wastes will help speed up the process and develop usable compost faster. Chop up larger pieces of household materials before adding them to your compost pile to speed up their decomposition.
  • Take a Turn for the Better
    Turning helps aerate the pile and shifts outer parts closer to the center where they can heat and decompose more effectively. A well-mixed pile will also have better consistency and more evenly distributed nutrients. Use a pitchfork, spade or rake to gently turn your pile periodically, such as once every 1-2 weeks or whenever you add a large amount of new material to the pile.
  • Know What to Compost
    Materials that can be composted are sod, grass clippings, leaves, hay, straw, manure, chopped corncobs, corn stalks, sawdust, shredded newspaper, wood ashes, hedge clippings and many kinds of plant refuse from the garden. Some household waste, such as coffee grounds, banana peels, eggshells and vegetable peelings are also ideal for a compost pile and will reduce the trash you accumulate.
  • Avoid Unwanted Materials
    Materials to avoid composting are large amounts of weeds, grease, fat, meat scraps and bones, cheese, coal ashes, diseased plants, cut weeds and charcoal. These materials do not decompose readily and can create poor quality compost. For example, meat, grease or dairy products in your compost will begin to smell strongly, which could attract rats, raccoons or other unwanted visitors. Diseased plants or weeds can survive in a compost pile, contaminating your garden when you add the compost to the soil in spring.
  • Cover as Needed
    Covering your compost pile with a tarp or large piece of carpet can help preserve the heat and moisture essential to promote appropriate decomposition. The cover can also keep the pile from freezing or getting too wet in winter conditions, and it can easily be removed to add new material or turn the pile as needed.

Before you toss out your next bag of trash, check for compost material and start your pile today! Your garden will thank you tomorrow.

compost_2

compost_1

Gardener Holding Tree Bark Mulch

Holiday Tree for the Birds

Celebrate the season with your feathered friends by decorating a tree in your yard, or even one in a container, with special treats they’ll love.

Bird-Friendly Ornaments

There are several types of delicious “ornaments” birds will love, and they can be fun, easy projects to brighten up a winter day.

  • Pine Cone Feeders
    Pine cones are easy to turn into impromptu bird feeders. Gather some pine or spruce cones. Tie a loop of twine or colorful holiday yarn around the top to use as a hanger. Fill the crevices with peanut butter, then roll in bird seed or cornmeal.
  • Orange Halves
    Don’t toss out that orange rind – turn it into a bird feeder! Fill scooped out orange halves with a mixture of peanut butter, suet and seed. Poke a length of wire, yarn or twine through the top to attach to the tree. Coconut halves are another great option.
  • Bird Cakes and Muffins
    Make “bird cakes” to set in the branches: Melt 2 cups of suet in a saucepan. Mix in 2 cups of peanut butter and several cups of cornmeal, until the mixture is soft but not too sticky. Spoon mixture into muffin cups and decorate with black oil sunflower seed. Cool before using.

Great Garlands

What’s a holiday tree without garland? To make a bird-friendly, edible decoration, string unsalted, unbuttered popcorn on lengths of heavy-duty thread, twine or yard (avoid fishing line that birds can get tangled in too easily). For more color and variety, add whole peanuts, cranberries, grapes and raisins to the garland as well, or even a few loops of whole grain, unsweetened cereal such as plain Cheerios. You can even include other dried fruits, but avoid any seasoned or sweetened options (those foods aren’t good for birds). Weave your edible garland among the branches.

And Lastly, the Tree Topper!

Top your bird-friendly feeder tree with a grapefruit “star” the birds will love. Slice the ends off a grapefruit, leaving a 1″ slice in the middle (use the ends to fill with seed or peanut butter mixture, a larger version of the filled orange halves). Wire 5 cranberries around the edge of the slice to form the points of a star, trimming away the excess rind in between if desired. Then, wire the whole thing to the top of your tree.

Now stand back and watch as your feathered friends enjoy their holiday feast!

bird_tree_2bird_tree_3bird_tree_1

Winter Silhouettes

Winter provides us the opportunity to examine our landscape silhouette, the flowing lines and overall shape of our landscape design. Combining varying heights, shapes and forms not only increases winter interest, but it also provides the framework for summer leaves, flowers and colors. So, how’s your garden’s silhouette shaping up?

Trees, Trees, Trees

Trees are the backbone of your landscape and are noticeable in every season. When flowers have faded and foliage has fallen, it is the trees that will be the stars of the show. If your winter landscape is lacking interest, here are some ideas for small to medium trees to provide winter texture and variety. If it’s too late (or too cold!) to plant now, consider the placement of one or more of our suggestions to incorporate after the big thaw.

  • Harry Lauder’s Walking Stick (Corylus avellana ‘Contorta’): This long-time favorite slowly grows to 8′ tall and wide. With drooping, twisty branches, this small tree is perfect in a large container, as a focal point or as a specimen in a small garden. Golden hanging catkins often persist through the winter. The contorted twigs and branches provide interest in flower arrangements.
  • Curly Willow (Salix matsudana ‘Tortuosa’): This upright rounded tree with curly twigs and branches grows to 30′ tall by 20′ wide, ideal for larger yards or bigger spaces. The twisted twigs, when encased in ice, bounce the sunlight around. When painted with metallic paint or shades of white, cut branches add interest to flower arrangements.
  • Paper Bark Maple (Acer griseum): This tree slowly grows to a gracefully shaped 15-30′ tall oval tree. Additional winter beauty is from its rich red to cinnamon-brown peeling and curling bark, which draws the eye both for its color and its texture. It’s simply beautiful against a snowy white background.
  • Weeping Cherry (Prunus subhirtella varieties): The fountain-like “weeping” form with slender drooping twigs casts fascinating shadows with its silhouette. Covered with a light dusting of snow or encased in ice, it looks like a sparkling Victorian chandelier and is an elegant focal point in the yard or flowerbed.
  • Slender Silhouette Sweetgum (Liquidambar styraciflua ‘Slender Silhouette’): A columnar variety of an American native, this tall and slender introduction grows to 40′ tall by 5′ wide, perfect for adding strong vertical pop to punctuate the winter garden. This is ideal for narrow spaces or smaller yards.

Of course, our helpful staff is here to answer any questions and offer landscaping suggestions tailored to your specific needs. There is no reason your landscape silhouette needs to fade into nothingness when winter arrives – we have the right trees for you!

silhouette-1silhouette-2

Holiday Poinsettia Care

A poinsettia plant is the quintessential holiday decoration and hostess gift for holiday parties or visits. They’re great as a centerpiece, decorating a step or filling in any empty space with bold holiday color and cheer. You can even position multiple poinsettias into elaborate arrangements mimicking trees or other holiday shapes. Have a look at our poinsettia do’s and don’ts list to help keep your poinsettia lush and beautiful through the holidays and beyond.

  • DO place your plant in indirect sunlight for at least six hours per day. If direct sun can’t be avoided, diffuse the light with a shade or sheer curtain to prevent burns that can discolor the bracts or dry the plant out too quickly.
  • DO provide room temperatures between 68-70° Fahrenheit. Generally, if you are comfortable, so is your poinsettia. Cooler (but not cold!) temperatures will be better than hotter areas, but you must avoid sudden chills.
  • DO water your plant when the soil feels dry to the touch. Use distilled water without any chemicals or additives. If you must use tap water, allow it to stand for 24 hours before watering so chemicals can evaporate out of the water.
  • DO fertilize your plant after the blooming season with a balanced, all-purpose fertilizer if you hope to keep the plant thriving for many weeks. Use fertilizer properly according to the manufacturer’s instructions.
  • DON’T place plants near cold drafts or excessive heat. Avoid placing plants near appliances, fireplaces or air ducts, and minimize ceiling fan use or other drafts and breezes near the plant. Don’t place poinsettias near exterior doors that are opened and closed frequently.
  • DON’T expose plants to temperatures below 50° Fahrenheit. Poinsettias are sensitive to cold, so do not place them outside during the winter months.
  • DON’T overwater your plant or allow it to sit in standing water. Always remove a plant from any decorative container before watering so you can carefully gauge the water it receives, and allow any excess water to drain completely to minimize the risk of root rot.
  • DON’T expose your plant to chilling winds when transporting it. Use the plant sleeve provided when you purchased the plant. If you will be giving the plant as a gift, wrap it lightly with tissue when transporting it.
  • DON’T fertilize your plant when it is in bloom. After blooming, use the appropriate fertilizer and follow instructions carefully to provide your poinsettia with the proper nutrition.
  • DON’T give up on your poinsettia! These plants can be stunning for many weeks after Christmas, and with proper care you can enjoy your poinsettia for long after the holiday season.

The Great Squirrel Battle for the Bulbs

Autumn is the catalog time of year, when gardeners devour and drool over the spring-blooming bulb catalogs, eagerly fantasizing about next year’s flowerbeds. We picture drifts of crocus and gaily swaying tulips, lush daffodils and glorious hyacinths. Snowdrops, irises, daylilies… Ah, the garden will be great this next spring.

Then we remember last spring – hours of labor and dozens of bulbs meticulously planted, but only one or two emerged to flaunt their blooms. What happened?

Squirrels and Bulbs

Squirrels like flower bulbs just as much as gardeners, but unfortunately not for their beauty. From the looks of the remains – chewed remnants, dug up holes, battered foliage – those bulbs became expensive squirrel food. Fortunately, if you want to plant daffodils, alliums, scilla, hyacinths, squills or fritillaria, your bulbs should be safe. Generally, squirrels don’t eat these. But how can you protect the bulbs that make the tastiest squirrel treats?

Keeping Squirrels Out of the Flowerbeds

Go ahead and order your bulbs. While you’re waiting for delivery, decide which of the three basic methods you will use to prevent the squirrel attacks. A small investment of time and materials will protect your bulbs.

  1. Mesh Barriers
    Wire mesh is the best protection to keep squirrels away from bulbs. Dig the hole for several bulbs, make a “cage” using mesh around the bulbs and fill in the soil. If the squirrels dig, the mesh will prevent them from eating the bulbs. You may also plant the bulbs as usual and place a layer of mesh on the soil. You’ll have to secure it to keep it in place then cover with mulch. Be sure the mesh layer is wide enough so squirrels cannot easily dig around the sides to reach the bulbs.
  1. Repellants
    Garden centers sell many different squirrel repellants, and deer repellants also repel squirrels. Some gardeners swear to the effective use of red pepper flakes mixed in the soil around, and over, the bulbs. Many squirrels don’t like spicy tastes, but pepper flakes may need to be replaced after heavy spring rains to be the most effective.
  1. Sharp Gravel
    Adding sharp gravel to the soil around and over the bulbs also deters squirrels from digging. Not only do they not like the feel of the gravel on their sensitive paws, but the gravel – which is heavier than dirt or mulch – is more difficult to move, so the bulbs stay safer.

There is another option to keep squirrels away from bulbs without completely discouraging their visits. If you can’t beat ’em, join ’em – because squirrels look for the easiest food sources, a squirrel feeding station stocked with corn and peanuts may be just the thing to keep the squirrels from looking for your buried treasures!

squirreldigging_250x250

bulbs_250x250

Bulbs: Increasing Your Yield

When you visit our garden center, you’ll find an incredible variety of autumn “bulbs.” Although they may look strange at this time of year, these “ugly ducklings” will become beautiful swans in your spring garden. It’s hard to imagine how these odd lumps can grow underground and become so gorgeous, but if you plant them now you will enjoy an incredible floral display next spring and summer.

How Bulbs Grow and Multiply

Did you know many bulbs will increase in quantity over time? Most gardeners simply divide their bulbs after a few years and move them to other parts of the garden or give extras away to friends. Dividing your yield is easy when you identify what type of bulb you are dealing with.

There are five distinct types of “bulbs” and although not all of these are available in the fall and some are not winter hardy, it is important to mention them to be able to understand their differences.

BULB TYPE

EXAMPLES

DESCRIPTION

HOW TO DIVIDE (after digging up)

Rhizome

Begonia, Calla, Canna, Ginger, Iris, Lily of the Valley, Tuberose


Grows horizontally from the pointed ends. As this bulb matures, it branches and develops other pointed growing ends. Roots grow from the bottom. Cut the rhizome into sections and ensure each piece has at least one pointed growing tip.
Tuber Anemone, Caladium, Cyclamen, Potato, Tuberous Begonia Buds and roots form anywhere on the surface. Tuber continues to enlarge with more eyes and roots. No basal plate or growing point. Cut the tuber into sections with at least one growing bud and root on each section
Tuberous Roots

Clivia, Dahlia, Daylily, Liatris, Sweet Potato


Actually a swollen root, new tuberous roots grow in a cluster from the base of the plant’s old stem or central crown. Divide the root cluster so each division includes roots and one or more growth buds from the stem base.
True Bulb Allium, Hyacinth, Lily, Daffodils, Snowdrops, Tulips Roundish shape with a pointed tip, covered with scales, and has flattened base plate where roots form. May have a papery outer skin. Forms little bulbs, “offsets” at base. Separate small offsets and plant individually.
Corm

Crocosmia, Crocus, Freesia, Gladiolus


Similar in shape to true bulb however there are no scales. Covered by a “tunic” of fibers. A corm decomposes each year; a new corm develops on top with smaller corms (cormels) on the sides or along the base plate. Separate new corms from smaller corms and plant individually.

Using Your Divided Bulbs

Once you’ve successfully divided your bulbs and bulb-like flowers, what do you do with your extra bulbs? There are many great options…

  • Transplant them into different parts of your yard to create a uniform, coordinated landscape with similar plants.
  • Give them away to neighbors, family members, friends, coworkers or anyone who would like to add new flowers to their yard.
  • Donate them to churches, schools, parks, senior centers or other places where extra flowers for landscaping will be appreciated.

As your bulbs continue to multiply, you will enjoy having more and more to choose from to create your ideal colorful, fantastic floral landscape.

bulbs_4bulbs_1bulbs_2 

Fall-Blooming Camellias

We love camellias! An Asian native and an old southern standby, they are now a favorite in the northern states as well. In recent years, new varieties have been developed for their increased cold hardiness, giving northern gardeners even more opportunities to enjoy these charming beauties. Blooming in October, November and even into early December, fall-blooming camellias provide an abundance of colorful showy blooms that can now be enjoyed in colder climates.

Camellias do best in rich, moist, well-drained, acidic (5.5-6.5 pH) soil. Plant camellias in a location where they will be protected from the drying winter sun and wind or else the delicate blooms may suffer. Because these shrubs are shallow-rooted, they should be planted no deeper than they are planted in the pot that you purchase them in. Apply 3-4 inches of mulch to the root zone to keep soil moist and control weeds. Compost added to the soil can also help provide suitable nutrition to keep these plants healthy. Water camellias first when newly planted and frequently during times of low rainfall – a drip system can be a great option to keep these shrubs suitably moist. Fertilize in the spring with a fertilizer specified for acid-loving plants. If purchasing and planting camellias in the fall, be sure to give them a little extra TLC to help them through their first couple of winters and they will reward you with their beauty for years to come.

To help you choose the most beautiful fall-blooming camellias for your landscape, consider these attractive cultivar options!

  • Ashton’s Pride: Lavender-pink, single flowers with yellow centers
  • Ashton’s Snow: Creamy white flowers in semi-double blooms
  • Long Island Pink: Single blooms with bright pink colors and ruffled petals
  • Mason Farm: Pink, single flowers with a white tinge
  • Northern Exposure: Pink buds that open to single white, papery flowers
  • Winter’s Darling: Deep pink flowers with anemone shapes
  • Winter’s Fancy: Deep rich pink, semi-double blooms
  • Winter’s Interlude: Light pink blooms with anemone shapes and peachy centers
  • Winter’s Joy: Bright bold pink, semi-double blooms
  • Winter’s Star: Single lavender-pink pale blooms with yellow centers
  • Winter’s Water Lily: Elegant white flowers with a formal double shape

No matter which fall-blooming camellia you choose, if you give it the proper care, it will love you right back with abundant growth and stunning blooms that bring an air of southern charm and hospitality to your yard.

camellia_250x250_3camellia_250x250_1

camellia_250x250_2

Autumn: Why Plant Now?

Although many gardeners plant trees and shrubs in the spring, knowledgeable gardeners plant in the fall to take advantage of all this fabulous season has to offer. But why is fall planting better than spring planting?

  • Stress Reduction
    Transplanting causes stress as plants are removed from containers, balls or established locations and changed to new locations. Planting in the fall, when a plant is entering dormancy and is generally hardier and sturdier, reduces this stress so the plant can thrive.
  • Establishing Strong Roots
    Fall planting “establishes” trees and shrubs by encouraging root growth. Because the soil is still warm, the roots continue to develop until freezing, though the upper parts of the plant are already dormant. When transplanting in the spring, the developed roots are active and delicate tips or rootlets, as well as buds and new leaves, are more easily damaged.
  • Weather Resiliency
    Trees and shrubs planted in the fall are better able to withstand the rigors of the next summer’s heat and dry conditions because they have much longer to develop healthy roots systems and become thoroughly established. This is especially critical in dry climates or areas prone to drought or irregular rainfall.
  • Faster Maturity
    The “head-start” of fall planting results in a larger plant in less time, helping create a mature landscape without waiting for smaller plants to catch up. This can be especially critical when replacing dead or damaged plants in a mature landscape to avoid a gap or uneven look.
  • Water Conservation
    Planting in the fall saves watering time and promotes conservation by eliminating daily watering. Cooler temperatures with the addition of both morning and evening dew contribute greatly to soil moisture availability in fall without as much supplemental watering.
  • Color Confirmation
    Fall is the best time to see a plant’s autumnal color. Planting in the fall eliminates the surprise of the wrong color or unexpected shades that may not coordinate with nearby plants. By planting in autumn, you’ll know exactly what you’re purchasing and planting, and you will be able to match better with your existing landscape.
  • Saving Money
    Last but definitely not least, buying your beautiful trees and shrubs in autumn can save big money. We discount prices on trees and shrubs to create room for holiday season materials and pass the savings on to you. Selection may be more limited later in fall, however, so don’t wait too long to take advantage of great savings.

Autumn can be the ideal time to plant trees and shrubs, whether you are adding to your landscape, replacing plants or starting a whole new look. If you plant in autumn, you’ll be amazed at how lovely your landscape will look next spring.

AutumnWhyPlant_2

AutumnWhyPlant_3

Fall Lawn Care

Fall is the best time of the year to overseed your existing lawn or establish a new lawn. If your lawn is a bit thin, has bare patches or needs good care, now is the time to take care of it so it can become thoroughly established before warm temperatures arrive in spring.

Overseeding A Weak Lawn

A weak lawn may have thin or scraggly patches, seem overrun with weeds or have bare patches that are difficult to keep green and lush. Overseeding can help eliminate these problem areas and create a more consistent, luxurious lawn.

  1. Spray broadleaf weeds with a selective herbicide and wait 2 weeks for the weeds to disappear. Several treatments may be necessary if the yard is thick with weeds.
  2. Take a soil sample of your lawn to determine the pH. A garden extension service can help determine pH levels, or home test kits are available.
  3. Mow shorter than normal and rake clean to remove unnecessary debris that may keep seeds from reaching the soil.
  4. Core aerate if you have compacted soil or heavy thatch. Remove the cores and dispose of them properly to keep the soil light and airy for seeding.
  5. Apply starter fertilizer and lime if determined to be needed by the pH test, or choose a grass type that will thrive in your soil’s conditions.
  6. Dethatch your lawn if thatch is thicker than ½ inch. This can be done with heavy raking or a special dethatching rake may be necessary in extreme cases.
  7. Overseed with the proper seed. If core aerating, lightly topdress with topsoil or humus.
  8. If needed, cover the freshly seeded area with netting or hay to discourage birds or other wildlife from consuming the seed before it grows.
  9. Water daily until grass has germinated, then soak once a week to encourage deep root growth.
  10. Fertilize in late fall with fall fertilizer.

Seeding A New Lawn

If you have no existing lawn or the entire ground is overrun with nothing but weeds, it may be best to start from scratch and create the lawn of your dreams.

  1. Kill existing vegetation with nonselective herbicide. If you want to preserve nearby trees or shrubs, take steps to protect that vegetation from the treatment.
  2. Take a soil sample of your lawn to determine the pH. A testing kit can provide a good pH estimate, or a gardening center or garden extension service can provide a more precise evaluation.
  3. Prepare soil by breaking up the surface with a rake or spade using a crisscross pattern. All large lumps should be broken up, and any large rocks should be removed.
  4. Broadcast starter fertilizer, lime and gypsum as determined by the pH test. This will provide a nutrition boost for fresh seeds.
  5. Spread topsoil or humus to a ½ inch depth for appropriate planting.
  6. Rototill to a depth of 4 inches and grade smooth. This will mix all the top layers together for uniform soil and nutrition, ensuring even turf growth.
  7. Sow proper seed and mulch lightly with salt hay to control erosion and conserve moisture.
  8. Water daily until grass has germinated, then soak once a week to encourage deeper root growth to resist droughts and repel weeds.
  9. Fertilize in late fall with fall fertilizer to provide nutrition throughout the season.

Which Seed?

Not every lawn will thrive with the same type of grass seed. Allow our staff to help you select the seed that best suits your needs, soil type and planting conditions. Apply at the recommended rate and incorporate into the top ¼” of soil. Do not bury the seed or it may not germinate evenly.

No matter what the condition of your lawn, fall is the best time to take steps to help it rejuvenate so you have an amazing lawn to enjoy in spring.

FallLawn_2FallLawn_1