Author Archives: GCS Dev

Ohio Goldenrod

As we ​step ​into ​our ​gardens in late summer and early fall, the landscape this time of year can be particularly ​vibrant ​and ​beautiful. ​

​One ​of ​the ​most vibrant ​is ​the ​Ohio ​Goldenrod, ​a ​unique ​wetland ​plant ​that ​stands ​out ​from ​other ​goldenrods ​due ​to ​its ​preference ​for ​moist ​environments. ​This ​plant, ​with ​its ​clusters ​of ​flowers ​blooming ​from ​July ​through ​September ​on ​three ​foot ​stems, ​is ​an ​eye-catcher. ​Its ​lance ​shaped ​leaves, ​upwardly ​pointing ​and ​attractive ​even ​without ​flowers, ​add ​to ​its ​charm.

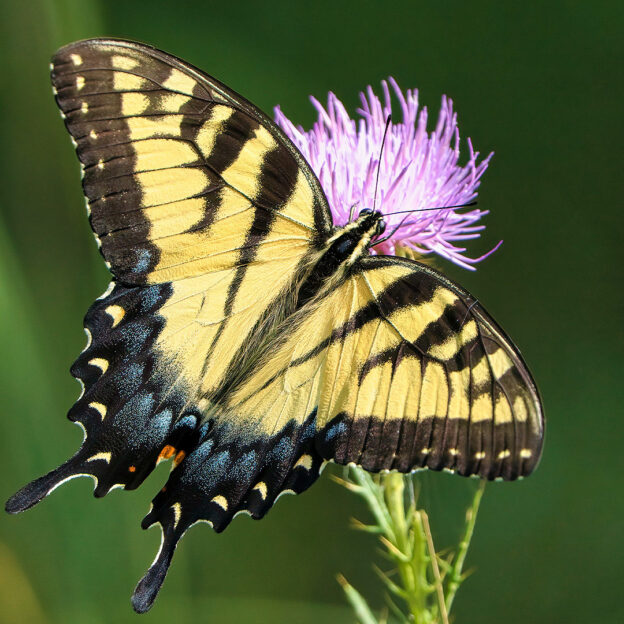
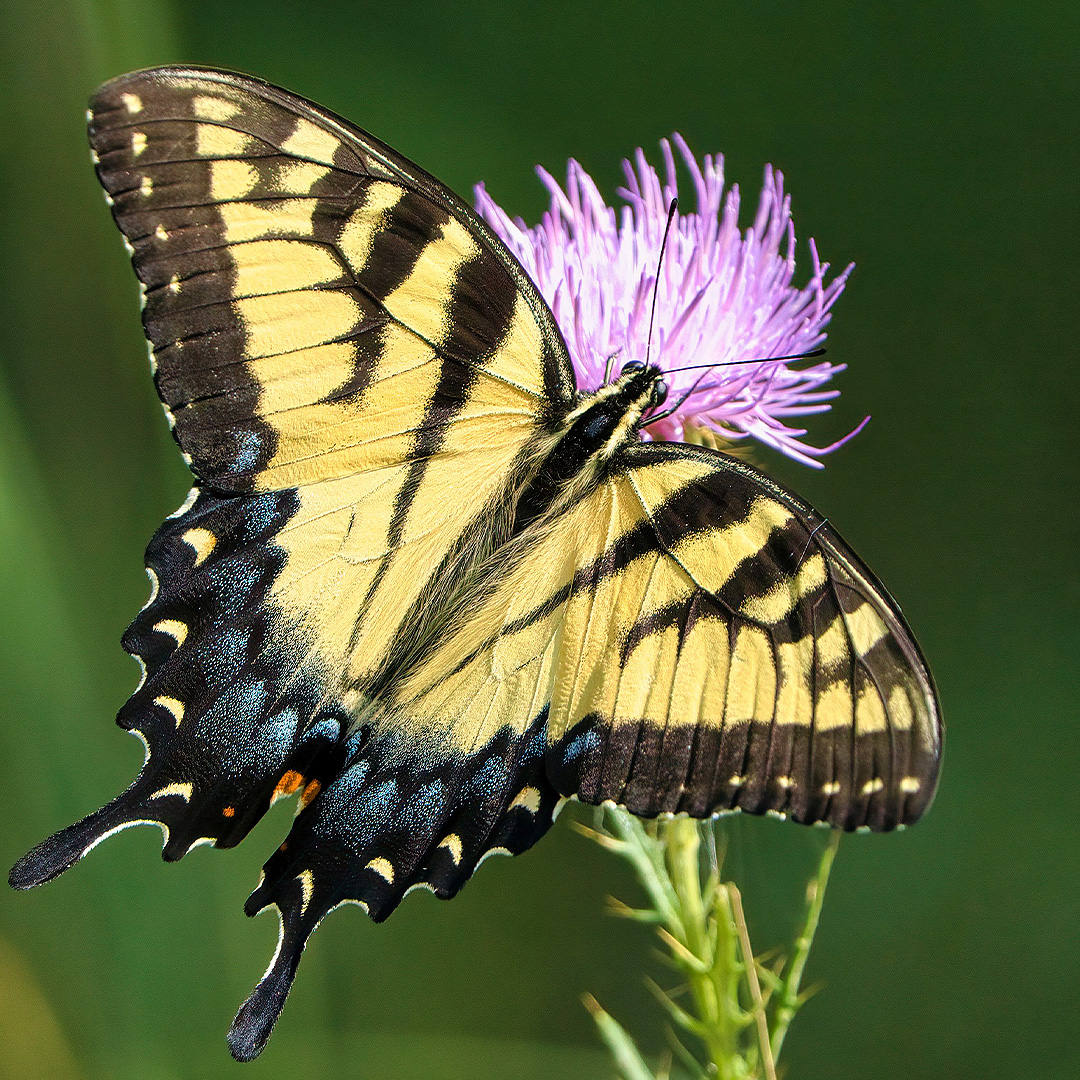
And for you butterfly lovers, ​the ​Ohio ​Goldenrod ​is ​more ​than ​just ​a ​pretty ​face. ​It’s ​a ​crucial ​nectar ​source ​for ​18 ​different ​species ​of ​butterflies, ​including ​the ​monarch ​butterfly. ​Without ​these ​specific ​nectar ​sources, ​the ​survival ​of ​these ​butterfly ​species ​would ​be ​at ​risk. ​

The ​goldenrod’s ​pollen ​is ​primarily ​spread ​by ​insects, like ​bees ​and ​butterflies. ​They ​are ​attracted ​to ​the ​plant’s ​bright ​yellow ​flowers. ​
Goldenrod ​has ​often ​been ​blamed ​for ​causing ​fall ​allergies ​like ​hay ​fever, ​but ​it’s ​actually ​not ​the ​main ​culprit. ​The ​pollen ​produced ​by ​oldenrod ​is ​too ​heavy ​to ​be ​easily ​carried ​by ​the ​wind, ​the ​main ​method ​of ​pollen ​dispersal. ​Instead, ​the ​true ​culprits ​behind ​fall ​allergies ​are ​typically ​ragweed ​and ​other ​wind ​pollinated ​plants. ​

The ​goldenrod ​has ​a ​rich ​history. ​Both ​Native ​Americans ​and ​early ​European ​settlers ​utilized ​goldenrods ​to ​create ​a ​vibrant ​yellow ​dye. ​

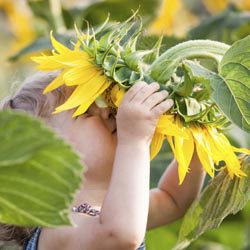
​Like ​the ​oxide ​sunflower, ​these ​plants ​are ​well ​adapted ​to ​the ​local ​environment ​and ​provide ​numerous ​benefits ​to ​pollinators. ​By ​planting ​native ​plants, ​you ​can ​support ​pollinators, ​preserve ​biodiversity, ​and ​create ​a ​more ​sustainable ​and ​resilient ​environment.

​So ​next ​time ​you ​see ​a ​goldenrod, ​remember ​it’s ​not ​just ​a ​pretty ​plant, ​but ​a ​vital ​part ​of ​our ​ecosystem.

Seed packets are the unsung heroes of gardening

They are a treasure trove of information, providing crucial details about the type of plant, planting instructions, and expected growth period. These packets, usually made of paper or plastic, are designed to protect the seeds from moisture and other external factors. They guide gardeners especially beginners on how to sow the seeds, the ideal soil conditions, and the recommended watering and fertilizing techniques. They also help gardeners keep track of the different types of seeds they have planted, making them indispensable for anyone looking to cultivate plants.

But what about seed packets from previous seasons?

Are they still valuable? The answer lies in several factors

  • the expiration date
  • the type of seeds
  • the storage conditions

Expired seed packets, or those containing seeds that are only viable for one season may not be worth much. However, if the seed packets have not expired and contain perennial seeds or seeds of plants with a longer lifespan, they may still be valuable. Proper storage conditions can help preserve the viability of the seeds and increase their worth.

Seeds are alive but do not live forever.

When you purchase a packet of seeds, they are already in a dormant state, waiting for the right conditions to germinate and grow into plants. The lifespan of seeds can vary depending on the type of plant and the conditions in which they are stored. Proper storage in a cool, dry, and dark place is crucial to extend the lifespan of seeds and increase the chances of successful germination. Speaking of storage, maintaining low temperature and low humidity is essential for optimal storage conditions. These conditions slow down biological and chemical processes, preventing spoilage, deterioration and damage to stored items.

By understanding and controlling these factors, we can effectively preserve the quality and longevity of stored goods.

The viability of seeds is another important factor to consider

Not all seeds have the same lifespan, and some can remain viable for a longer period of time than others. If a seed is still viable, it can be planted and has the potential to grow into a plant. However, if a seed is no longer viable, it is recommended to discard it.

Let’s not forget about flower seeds

There are both annual and perennial flower seeds, each with its own unique characteristics and requirements. Proper care and maintenance are key to ensuring successful germination and growth of flowers. Finally, is it worth saving an old seed packet? A simple germination test can help determine the viability of the seeds. If the seeds do germinate, it indicates that the seeds are still viable and can be used for planting. However, if the seeds do not germinate, it suggests that the seeds may have lost their viability and it may not be worth saving the old seed packet.
Bringing The Outside In: A Guide To Indoor Gardening

With proper care and attention, indoor plants can thrive in any environment

Many of us are concerned about the survival of our green friends, be it a resilient snake plant or a delicate Peace Lily. This concern often stems from the belief that indoor environments are not suitable for plants and that they will inevitably die. However, with the right care and attention, it is possible to create a suitable environment for indoor plants and gardening.

Let’s start with the basics.

Indoor environments can be challenging for plants, as they often lack the necessary sunlight and humidity that plants need to thrive. But fear not, there are ways to combat this. Placing plants near windows to maximize sunlight exposure and using humidifiers or misting the plants can increase humidity levels. Choosing the right plants for indoor environments is also crucial. Opt for plants that are known to be more resilient and adaptable to indoor conditions. For instance, the tongue snake plant and the Peace Lily are known for their ability to purify the air and improve indoor air quality. They are low maintenance and thrive in indoor spaces, making them a great choice for beginners.

It’s important to remember that all house plants require attention and maintenance to thrive.

This includes providing the right amount of water, sunlight and nutrients, as well as regular pruning and repotting when necessary. Overwatering can be detrimental to the health of house plants, leading to root rot and other issues. Therefore, it’s crucial to allow the soil to dry out between waterings and ensure that the pot has drainage holes. Another factor to consider is the risk of burns on the foliage of plants. This can happen when a plant is not receiving enough light and tries to reach towards the source of light. However, this stretching can lead to burns on the leaves due to the intense heat and sunlight coming through the window. Providing adequate light is crucial to prevent this issue.

Don’t forget to regularly fertilize your plants to provide them with the necessary nourishment.

But remember to reduce the frequency of fertilizing during certain periods to avoid void overnourishment. In conclusion, indoor gardening can bring beauty and freshness to any indoor space. Indoor plants require understanding, care and attention. With the right practices, you can ensure the survival and well-being of your indoor plants. So let’s embrace the green and make our homes, uh, a thriving sanctuary for these wonderful beings.

Fill In Those Empty Spots In Your Garden

Alan: Well once you’re into June, people wonder what next? The gardens looking good. But sometimes things just don’t make it. Sometimes you find a spot over here that you really want to add something and it’s not too late in June.

June is a great time to continue to plant. We even grow plants in larger containers so that you’ve already planted something and you don’t want to start off with a little plant that doesn’t match. So we have things in larger containers that you can just pop right in and fill in that space and match everything else.

We plant our crops that we grow at the greenhouse, we don’t grow everything at the same time. We don’t just plant tomatoes once and here’s our whole crop of tomatoes for the year. Because some people are planting those tomatoes middle of May and they don’t want some plants it’s overgrown and just scraggly and it doesn’t look good.

So we plant several times throughout the season so that when you come in June, there’s still going to be some plants that are at their peak at that time. So we planned it that way, because people do plant later on.

A thing that would be good in June is to look at your vegetable garden. At this time you probably harvested quite a bit of your cabbage and broccoli and cauliflower, things like that.

So now the is a good time in June to go back in and now you can plant a tomato there. It’s not too late. It’s a good time. So you’re making double use of that space. Things that you harvest early. It’s now time to go ahead and plant the things that will go later, like the peppers and tomatoes, things like that.

Should I Fertilize In The Morning Or Evening?

Alan: Some things that you fertilize, and this would be true for regardless of when you’re doing it, more is not necessarily better. I know people, myself sometimes, if it calls for one teaspoon, two must be better. So that’s not necessarily the case especially depending what fertilizer you’re using.

A water soluble type something that is taken very readily through the plant, very instant kind of effect. Versus something that’s slow release or time release fertilizer, which tend to be a lot safer. You can still burn but not to the severity that you can with some of those water soluble ones. Especially in some of those hotter months. So just be careful with that. If it says a teaspoon or two teaspoons, whatever product you’re using, especially on those water soluble ones, you can do some burning in those hotter months.

And it would be something that you’d want to try to do in the early morning. Just so the plant is not under stress in the early morning, and it gives the the entire course of the day for the foliage to dry out.

If evening is your only option, you don’t hear about evening because the water stays on the foliage. The plant stays wet through the course of the night. And again, going back to some of the fungal problems. That would be something that would just, not necessarily cause it, but could encourage it. And we’re not trying to do that. So just remember stay away from those midday fertilizing applications.

June Insect Control Tips

Alan: Another popular topic in June is insects. That you really want to keep an eye on. You don’t want to just ignore it and then just wake up one day and look at your garden. It’s covered in aphids or it’s covered in something.

A lot of people want to use organic insecticides and organic fungicides, and that’s great. But you have to do those as preventatives. Once you have a big problem and you have aphids covering something or you have whatever the insect might be, once you have a problem with it, organic products just don’t work as well. I mean, they will help.

But if you use those as a preventative to prevent the problem in the first place, they’re much more effective

Don’t come in with a branch, that’s with fungus all over it and say, you know, what do you have that’s organic to take care of this. Because organic fungicides are good for preventative, but they’re not really that effective for taking care of problem that you already have.

So keep in mind, an ounce of prevention is worth a pound of cure, and it’s especially true with organics.

Kevin: We’ll use plants in our greenhouse and encourage customers to ask this, if they don’t know. But we use plants as scout plants. We can pick on any plants. A portalachka is going to get these aphids first. Aphids are a chewing insect, so they like the freshest softest tissue. Once that tissue hardens off, they can’t bite into it. It’s not as tasty for them.

Aphids on burning bush, the perfect scout plant. You see a little bit of curl on your burning bush leaf. It’s almost 100% going to be aphids. Aphids are hungry right now. I need to look at this plan, or this plan, because they also like aphids, so I need to get my treatment down.

Alan: That’s the same with Japanese beetles. That’s another big problem that people run into. They come in and want to buy these bags. The Japanese beetle traps. And those are great. They do catch the Japanese beetles.

But if you put those right in your garden, you’re attracting all these Japanese beetles and everyone to munch on your garden on the way to the bag. So the best thing is to buy your neighbor one. You say I got you a gift and you buy them the Japanese beetle bag, so they go to their yard to fall into the bag. Just sort of kidding.

But if you have a spot or somewhere away from your garden, that you can put the bag, that would be the best thing because you don’t want those things having lunch on the way to the bag.

June Trimming And Pruning Tips

Alan: Are there plants that should be pruned June?

Kevin: Anything that was a spring flowering plant. I mean by that time depending in June your lilacs are done flowering. Your forsythias and things like that, some of the azaleas, all that type of stuff. All that stuff’s done flowering. That would definitely be a time to either deadhead those plants depending on the plant or just give that thing a nice haircut.

It’s probably getting through its first flush of growth. And so maybe you got kind of some irregular branches where it just kind of threw out a stray branch that’s not where you want it to be. It doesn’t look like that perfect plant you envision. June would be a fine time to kind of clean that up and neaten and tidy those plants up.

Things that you wouldn’t want to prune would be things that are flowering. Things like some of the hydrangeas, some of the butterfly bushes, roses.

A lot of the roses that we’re selling are free flowering. People think about roses and they think about maintenance and where you would have to prune them to encourage new flowers from growing by not let the hips form from the old flowers. And cut the cane back so far.
The roses today, most popular are these free flowering shrub roses. Where they’re also self cleaning. They make enough flowers where, not that you couldn’t clean them up, but it’s not necessary. They just flower right past some of those old flowers.
How And When Do You Control Bagworms?

Alan: Another thing, especially late May that you want to remember, is that, you don’t see them yet, but there are little baby insects out there ready to sprout and start to devour your plants or your trees. One question we get normally after June is what are all these bags hanging off of my evergreens.

Well, they’re bagworms.

But the time to take care of bagworms is late May and early June. And you want to spray because the bags that are there, each one can have up to 300 larvae in it. And they come out of that bag and they just spread and then they go and start making bags with their own.

You may have gone out and you didn’t see anything, it’s all clean. And the next day you go out and look and you got bags hanging all over your tree. So the product you might consider if you do it early enough is bacillus thuringiensis, it’s hard to say that last word. But that’s a natural spray, and it’s a bacteria. But it works as long as the larvas are small.

Once you get into the larger sizes, if you didn’t spray and it gets into June or even July, it’s too late to use that. Because it’s just not going to be effective on larger larva that size. It’s good to do that in late May. And then that could take care of any problem that you’d have developing the bags later because you’ve taken care of it. Later than that, you’re going to have to use another insecticide.

And if you wait till August, then it’s too late. If you spray, they’re going to seal themselves in that bag and you can’t spray them after that. It’s just a matter of going out and picking those bags off. I’ve done that before and spent a lot of time picking bags and think I’ve got it. Then next thing “Oh, there’s another one. Oh, there’s another one. Oh, there’s another one.” It’s a never ending job.

What Is Part Sun? What Is Part Shade?

Alan: Another question we get a lot in May, because that’s the busiest time of the year for us and for gardeners, is that people will ask, Well, what can I plant in this much sunlight?

Well, what is full sun?

What is part sun?

What is shade?

Well, obviously, shade means it’s not not getting any direct sunlight. But when you look at a plant tag, and it says, this is for part sun, what does that mean? It’s generally accepted that part sun means around four hours a day or less. But it does get direct sunlight. Full sun is considered anything that gets six more hours of sun a day.

So you really need to know your own gardens, your own house.

And people come and say, Well, my house space is this way. And so they think that’s enough information to know how much sunlight something gets. Well, does your neighbor have a tree across the street that’s huge that blocks part of that sun? It doesn’t matter what direction your house faces if there’s something blocking the sun. And people will sometimes not realize that they’ll put a plant in that’s not for that area.

Now, I’ve heard quite a few people plant a lilac and say, my lilac never blooms. Then I’ll ask how much sun does it get? Well, it gets a little bit in the morning. That’s not enough. A lilac needs at least six hours. Preferably more. So if you plant a lilac, somewhere that it’s not getting enough sun, you’re not going to be happy with it. So you need to know how much sun things get.
And if you’re looking at it in the wintertime, it’s going to get less sunlight in an area because the sun rotates and it moves. So when you want to know what light you’re getting, look at it during the growing season.
And time it.

Because that makes a difference. Some people think it gets all afternoon sun. Maybe it doesn’t maybe you just assume that. So it’s good to know because if you plant shade things in sun, they’re going to burn up. If you plant some things in the shade, they’re not going to bloom.

Kevin: Another thing you said was the time of day is it. Is it six hours of morning sun or is it four hours of afternoon sun?

Alan: The intensity of the sun makes it makes a difference and how the plant is going to tolerate it.

How To Keep Hanging Baskets Beautiful

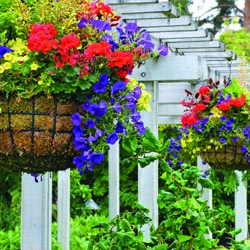
Alan: Well, a popular item for Mother’s Day are hanging baskets.

Kevin: Butterfly bush.

Alan: Butterfly bush? Maybe. Depends on your mom. But most normal moms are going to really appreciate a beautiful hanging basket or a container combination pot. These things are already grown. They’re already beautiful when you buy them.

And at Dill’s Greenhouse, we have a huge selection of many different sizes. We have eight inch, we have 10 inch, 12 inch, 14 inch, we have moss baskets, a big container with a spagnum moss around the edge of it and much more soil volume so you can have different plants in there that end up with a huge basket that can actually be grown because there’s enough soil to grow it.
Taking care of hanging baskets.

Now, when we sell a basket we put, as you’re carrying it out the door, will put a slow release fertilizer on it. That helps fertilize the plant through the summer months. The fertilizers that we use is a five to seven month fertilizer. It doesn’t take care of all the fertilizer needs. You’re going to want a couple of times a month at least to put some Miracle Gro or some kind of water soluble fertilizer on that. And especially some plants that are heavier feeders like petunias.

Petunias, they like a lot of fertilizer, so you want to take care to make sure to put those things on there because if you don’t, it could start looking straggly, not the beautiful plant that you bought. And then you’ll think what’s wrong with this.

Another thing to consider is, as the plants get really big and start to hang down too low, just prune it. If you prune a basket, well, one time through the growing season, it’s going to make that basket stay beautiful throughout the whole summer.

And the other thing to remember with a hanging basket is to water. You have this ball of soil up in the air with the plant growing in it. It doesn’t have the ground to protect it. It’s going to dry out a lot more than the ground is. So you want to make sure that you keep adequate water on it. You don’t want to keep it soaking wet. But let it dry down to where the plant has not started to wilt yet, but that you can be picked up that basket and feel that it’s lighter. If you can feel that, it’s time to water. Then water until it takes up all the water it can, it’ll start to run out of the bottom of the basket. Then don’t water it again until it’s dry again. So you don’t wanna keep it wet.

But now there are times in the summer, you’ll have to water every day, especially the smaller the basket, the more often you’ll have to water it. And there are several plants that you can buy that vinca, portulaca, they do a lot better if you’re one who neglects watering, and get home from work and notices, oh, no, it’s already wilting. Those things can recover really fast and they just don’t need as much water as other plants.

So if you’re really good at watering, then go ahead and buy a fuchsia. Fuchsias are beautiful, but they will dry out on you. And if you let that happen too many times they’ll recover but they lose their blooms. So you don’t want to lose all your blooms. That’s why you have the basket.