Monthly Archives: February 2017

Clematis

Beautiful, showy clematis are not as difficult to grow as you might think. Learning when to prune your clematis and giving a little attention to their few requirements will reward you with a magnificent show of colorful blooms.

Planting Clematis

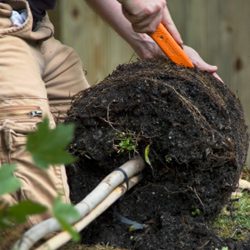
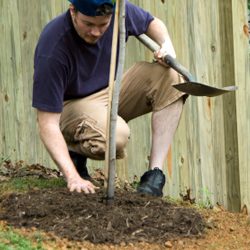
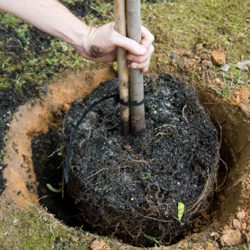
A beautiful clematis starts with proper planting. Clematis prefer to have their roots in the shade and their tops in the sun. Keep the roots cool with a well-drained rich soil with added compost, peat moss or composted manure and a good layer of mulch. Planting ground cover or other low growing perennials around the base of your clematis will also help to keep the soil cool and minimize weed growth. Organic amendments will help to retain moisture when added to the soil. Feed monthly with a liquid fertilizer or use a slow release fertilizer which can last for up to six months.

A Note About Bloom Rates

For the first few years, clematis may be slow to grow. Just keep in mind that it is establishing its root system, which is essential to a healthy, vibrant plant. In its first year, your clematis may produce very few flowers or even none at all. By the second year there will be more growth and a few flowers. By the third year you should see substantial growth and many lovely blooms.

Planting Clematis

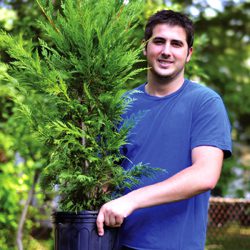
For the best chance of success if you are new to gardening with clematis, buy plants in larger containers. While smaller starts will be less expensive to buy, they will take a little more work to establish and can be more delicate and prone to failure. If you purchase a pot of any size and are not planting it in the ground immediately, be sure not to allow the soil in the container to dry out or the plant may be overly stressed and vulnerable.

Keep the climbing habit of clematis in mind when selecting your planting site. Allow your plants to grow up into large shrubs and trees, or on a trellis against a sunny wall. Select varieties with growth that will not exceed your shrub or trellis; a 20-foot vine may overwhelm a smaller shrub or a weak trellis and will look overgrown and out of place.

Proper Pruning

Clematis are divided into three distinctive groups. Knowing what group your clematis falls under will guide you on when and how to prune.

These pruning suggestions are for established vines that have been in the ground for at least three years. Young vines should all be pruned to 12 inches the second spring and to 18 inches the third spring. This helps to develop more shoots, a fuller vine and a better root system.

  • Group 1
    This group includes certain species clematis and their cultivars which bloom early in the year. Some of the more familiar representatives of this group include the Montanas, varieties of C. alpina and C. macropetala. All of the Group 1 clematis bloom on growth made the previous year. They can be pruned to keep them within their allotted space or to remove dead and unsightly foliage. If they are pruned late in the season or before they flower, however, the cuts may remove potential flower buds and reduce that year’s flowering. To prevent this, prune Group 1 clematis right after flowering.
  • Group 2
    These are the large flowered hybrids. They are often divided again into two subgroups – 2a and 2b. All of the clematis in Group 2 bloom on ‘old wood’ (actually on short shoots from old wood) and should not be pruned except for deadwood pruning in early spring after the leaf buds open slightly.
  • Group 3
    These are the summer-blooming varieties such as the viticellas and Jackmanii types that bloom on new wood and the late bloomers such as Sweet Autumn Clematis (C. terniflora) and orientalis types. Clematis in Group 3 mainly flower on new wood produced in the current year and should be pruned back severely every year in late winter, when they are completely dormant, to about 12-14 inches. Leave at least two pairs of buds on each stem of the plant. Most clematis in this group are very fast growing and will reach their full height before blooming every summer.

Once you know how to properly care for clematis, you will find it to be a welcome addition to your landscape. If you aren’t sure just what your clematis needs to thrive, our expert staff will be glad to help be sure you and your plants have a great relationship!

clematis_1

clematis_2

clematis_3

clematis_4

Amsonia hubrichtii

Amsonia hubrichtii, commonly known as Arkansas blue star, Arkansas amsonia or threadleaf bluestar, grows 36 inches tall and 36 inches wide in a mounded form. This hardy perennial grows in hardiness zones 4-9 and is a versatile North American native ideal for many landscaping uses in all types of yards and gardens.

Amazing Seasonal Interest

Unlike many plants that truly shine only for one season, Amsonia hubrichtii offers a variety of features throughout the seasons. From late spring to early summer, 2-3-inch wide clusters of small, light blue, star-shaped flowers are borne above the delicately soft, ferny or lacey foliage. The alternate-arranged, narrow leaves are a marvelous bright green in spring and summer, but turn a bright yellow-golden color which is second to none among herbaceous perennials in fall. In winter, the foliage can hold its shape and support snowfall, creating a beautiful mounding effect in the winter landscape.

Caring for Amsonia hubrichtii

These plants thrive in full sun to partial shade and perform best in average, moist, well-drained soil with a neutral (7.0) pH. Full sun will promote the best autumn color, but spring and summer blooms will be more prominent in a part-shade location. In a full shade location or when planted in too-rich soil, however, the plant may tend to open up and flop over, losing its full mounding traits. Though initially slow to grow and less lush and attractive when young, once established, it can tolerate drier conditions. Having no known severe insect or disease problems, other than minor occurrences of Mycosphaerella leaf spot and rust, this is a very easy to care for perennial.

After the flowers have faded, cutting back the foliage to 6-8 inches will help keep the mounds full and compact. Late season growth will fill in the plant in plenty of time for its showstopping autumn color. When the plants are large, they can be divided for transplanting to add even more specimens to the landscape.

In the Landscape

Amsonia is a real asset in borders, native gardens, cottage gardens or open woodland areas. Because of this plant’s versatility, it is also ideal in rock gardens or even rain gardens in well-drained soil. It is best when planted in masses and very attractive when mixed with ornamental grasses and other plants that have attractive seed heads. It tolerates deer and attracts butterflies, making it wildlife-friendly as well.

The outstanding ornamental qualities, ease of maintenance and many uses make Amsonia an invaluable perennial selection for any gardener.

amsonia_1

Kids and Nature: Uncovering Surprises Everywhere

Wherever you live, nature is always near, with entire worlds to discover around the trees in your yard, in the carpet of grass or beneath that pile of rocks. With school vacations rapidly approaching, you may already be thinking of ways to keep your children or grandchildren busy during the long summer months. Well, how about setting up your own Nature Camp! An appreciation of nature will stay with children forever and teach them the importance of caring for the environment and all living things, including themselves. 

Top Nature Activities for Kids

Spring and summer nature activities with your child could be as simple as a daily walk around the block or backyard, or as complex as starting your own backyard wildlife preserve. Popular options include… 

  • A stroll through the woods or a nearby meadow, observing or gathering things of interest along the way. Spend some time watching ants or earthworms, caterpillars or butterflies. Take an evening walk to look for fireflies and bats or to listen to crickets and frogs. Note different species of birds, or look for other wildlife such as squirrels, rabbits or deer.
  • Very young children love collecting things – rocks, feathers, flowers, shells and leaves are a few easy examples. See how many different types, colors, shapes or sizes they can find. Older children might want to start a pressed leaf or flower collection, or capture some insects for identification and observation.
  • Raising butterflies or moths from caterpillars, noting how they grow and change in a nature journal or through a series of photographs to create a scrapbook of the experience. When they’re ready to be released, let the child have the wonder of connecting with nature as their fluttering friends fly free.
  • A more extensive nature activity could be to help your child plan and plant a whole garden devoted to attracting wildlife. By planting trees, shrubs, perennials and annuals that attract birds (including hummingbirds) and butterflies, and by installing bird feeders, bird houses and bird baths, you can create a miniature wildlife refuge that you and your child can enjoy for many years to come.

We’ll be delighted to help you and your future naturalist select plants suitable for a wildlife garden, plan a backyard refuge or to identify flowers or leaves that have been collected on your nature walks. 

So, what are you waiting for? Make the most of this spring with a child and go back to nature!

childgardener_3

childgardener_1

childgardener_2

Flower Carpet Roses

The Flower Carpet Rose is a disease-resistant, low-growing shrub which requires none of the usual care that other roses do. Not only does it produce thousands of blossoms over the growing season, but it is virtually care-free. Deadheading, pruning, spraying and constant feeding are all unnecessary to keep these plants looking their best, although deep watering is suggested for new plantings. Once established, Flower Carpet Roses can become quite drought tolerant.

Flower Carpet Roses in Your Landscape

Flower Carpet Roses can be used in a variety of ways in the home garden. These plants are wonderful for foundation plantings, for covering sloping banks, to line a walkway or driveway, in large containers, alongside a quaint fence or simply mixed in among other flowers in perennial borders. The Flower Carpet Rose can go anywhere and still look spectacular. More adventurous gardeners may even want to train these roses into tree forms for amazing specimens and landscape focal points. They work well in terraces or other hard-to-reach locations, can help with erosion control on steeper slopes and are beautiful alongside water features or to create a welcoming, colorful entryway. Just be sure that wherever you position the plant, it will have adequate room to spread out to its full potential and blooming glory. Full sun is preferred for the best, most prolific blooming, though these roses will still bloom in part shade locations, albeit not as prolifically or for as long throughout the season.

Flower Carpet Roses are a top ground cover rose and can flower for up to 10 months (depending upon climate and soil condition), producing up to 2,000 blooms from spring to fall. Rich, glossy green foliage also adorns this full, rounded shrub and provides a luscious contrast to the blooms, which come in pink, red, yellow, peach and white hues, as well as subtly variegated shades. Even when the blooming is finally finished, these roses stay neat as the foliage and spent blooms drop cleanly away – no deadheading or cleanup intervention required.

To keep the shrub in shape, just cut back with shears to 1/3 size in early spring to keep them as a mounding form. Even pruning novices can manage this task – these roses aren’t fussy about the type of cuts or the direction in which they’re made.

Flower Carpet Roses are every gardener’s dream – virtually care-free, trouble-free plants that produce masses of colorful flowers throughout the growing season. Who could ask for more? Except, perhaps, more room to plant them!

Choosing the Right Flowering Tree

Choosing the right flowering tree for your landscape is an investment. It can raise the property value of your home and bring you pleasure, beauty, and shade for many years to come. Selecting the proper flowering tree for your enjoyment is easy! Just follow these simple guidelines and remember, we are here to help you with any of your gardening questions.

  1. Care
    Familiarize yourself with the sun patterns where you plan to plant the tree. Will your tree be in full sun, part sun, or shade? What about soil type? Is it heavy clay or well-drained loam? Some trees will survive in poor soil, some will not. Is there a water source nearby? Having a clear understanding of your tree’s cultural requirements and the characteristics of the site you have chosen will help you make a good match so the tree will thrive.
  2. Size & Form
    Consider the space. Know the ultimate height and width of the plant that you choose to make certain that it will not outgrow the room you have allotted for it. At the same time, note the growth habits and sizes of nearby trees and shrubs to be sure they don’t crowd one another out in the years to come.
  3. Flowers
    When you would like your tree to flower? For instance, you don’t want flowers in August if that is when you are traditionally away on vacation. Many flowering trees are available in more than one flower color, depending on the cultivar. Choose the one that works best for you and your taste and looks good with whatever else you will have flowering at the same time.
  4. Other Ornamental Characteristics
    Choose a tree with multiple seasons of interest. Look for a flowering tree that may also have interesting winter bark, persistent fruit, or unique leaf coloration so you can enjoy its beauty in every season.
  5. Availability
    Frequently, folks will read about a unique new plant introduction and are disappointed when it is not yet available on the market or does not grow well in their area. To avoid disappointment, choose from our large selection of flowering trees in inventory. We pride ourselves on carrying plants that thrive in our area. We can suggest an appropriate substitute for your desired tree.

With just a bit of careful consideration, you can easily choose a flowering tree that you will enjoy for many years to come.

FloweringTree_3

FloweringTree_4

FloweringTree_5

Summer Sizzles With Crocosmia

There is an excellent assortment of bulbs available for planting this time of year that promise a bounty of summer blooms. The thing is, many of these bulbs are not winter hardy. This can create a predicament for gardeners anxious for easy summer flowers but short on time and space to dig and store tender bulbs. Crocosmia can be the answer.

Introducing Crocosmia

Native to South Africa, Crocosmia – also known as montbretia, coppertips or falling stars – sizzles all summer long in colors of yellow, orange and red. The numerous small florets are tubular in shape and borne along a long, gracefully arching stem rising above sword-like foliage. Together, this formidable combination creates exotic elegance sure to be a showstopper in the garden or landscape. Hummingbirds and butterflies also find it irresistible when in bloom, and the fall seedpods are delectable for many seed-loving finches and sparrows.

Planting Crocosmia

Plant Crocosmia corms now, while they are available. Plant them in well-drained soil in full sun, 2-3 inches deep and 8-10 inches apart. A south-facing location is best, or in colder regions, add Crocosmia next to a wall that will help warm the soil. The pointy side of the bulb should be facing up. Place a handful of bone meal in the planting hole and water the soil well when done planting. These are drought-tolerant flowers, but supplemental water will still be welcome in extremely dry conditions.

Crocosmia look best when planted en masse. A grouping on either side of a sunny entrance way can be stunning, and they look equally fetching when tucked into the perennial border. This plant performs well in containers and makes an excellent cut flower – in fact, cutting the flowers will encourage even more beautiful blooms to form.

Blooms will first appear in May or June and will continue blooming throughout the summer. Flower spikes can stretch 2-3 feet tall, adding a bold burst of color to the landscape. Even without the flowers, the blade-like foliage is attractive, and some cultivars show pleats or rippling for more textural interest.

After flowers have finished blooming, simply snip off the faded flower stalks. Leave the foliage to fade naturally as you would with any other bulb. These leaves continue to produce food to provide nourishment for next year’s flowers. Leaves may be cut back to the ground once they are completely yellow, and a thick layer of mulch should be added for winter protection. Once established, these bulbs are winter-hardy and will return year after year to heat up the spring and summer with their gorgeous colors and forms.

Crocosmia

Edible Flowers

Flowers aren’t just for beautiful dining table centerpieces anymore! For all you “foodies” out there, who also love flowers, are you aware that there are numerous blooms that are not only edible but also delicious? Flowers make a striking, colorful, textural and flavorful addition to soups, salads, baked goods and more.

Safety First

There are just a couple of things to keep in mind when experimenting with unfamiliar flowers. Not all flowers are edible and some can be poisonous, even in small tastes. Be certain to clearly identify your flowers and accept no imposters, as some blooms can look very similar. Also, it is best to use flowers that have not been sprayed with chemicals – either fertilizers or pesticides. The best way to avoid both of these issues is to grow your own edible flowers from seed, keeping them conveniently in a kitchen container garden or safely on a deck or patio where there’s no risk of contamination or misidentification.

Favorite Edible Flowers

There are surprising blooms that can be tasty accents to your favorite dishes. For the best flavor and freshness, harvest blooms at their peak early in the day. Younger and older blooms or blooms of different sizes often have subtly different flavors, so be sure to experiment to find your favorites.

  • Bee Balm (Monarda didyma) – Tea-like flavor, flowers in white, pink, red and lavender
  • Borage (Borago officinalis) – Cucumber-like taste, flowers in lavender, purple and blue
  • Calendula (Calendula officianalis) – Peppery taste, flowers in yellow, orange and gold
  • Chive (Allium schoenoprasum) – Onion flavor, flowers in white, pink and lavender
  • Nasturtium (Tropaloum majus) – Peppery flavor, flowers in white, yellow, orange and red
  • Pineapple Sage (Salvia eleagans) – Sage flavor with pineapple undertones, flowers in scarlet
  • Pinks (Dianthus spp.) – Clove-like flavor, flowers in white, pink and red
  • Red Clover (Trifolium pretense) – Sweet tasting, flowers in pink and red
  • Signet Marigold (Tagetes tenufolia) – Citrus taste, flowers in white, yellow, gold and red
  • Viola or Pansy (Viola spp.) – Sweet flavor, flowers in a multitude of colors

Not sure which recipes to try? Flowers make surprising accents to salads or garnishes for cakes, cookies and ice creams. Add flower petals to a favorite drink, or freeze blooms in ice cubes for colorful cooling. There are even recipes available for sauces, salsas, marinades and more, all with more taste and color thanks to edible flowers. Bon appétit!

EdibleFlowers_4EdibleFlowers_1EdibleFlowers_2

Caution in the Garden… Chlorosis

Yellow means caution, even for plants. While leaf yellowing, known as chlorosis, may be a signal that there is a problem that requires attention, it may also be normal. Understanding when this coloration is to be expected and when it indicates a problem is essential to be sure you’re giving your plants the proper care.

The Good and the Bad About Chlorosis

Chlorosis is the scientific word used to indicate the full or partial yellowing of plant leaves or stems and simply means that chlorophyll is breaking down. There are times when this is normal, expected coloration, and there are times when it indicates deeper problems that need attention.

  • Normal Chlorosis – Yellowing leaves at the base of an otherwise healthy plant is normal; the plant is simply utilizing the nitrogen and magnesium for exposed leaves near its top rather than older, lower leaves. These yellowed, older leaves will eventually shrivel and fall off as newer growth emerges at the top of the plant.
  • Chlorotic Response to Light – Moving a plant from full sun to shade, or visa-versa, can cause yellowing leaves as the plant reacts to the change and stress. Make sure that you grow and maintain your plant in the proper light. Also bear in mind seasonal changes that may affect how much light a plant is exposed to, even if it hasn’t been moved.
  • Chlorotic Response to Moisture – Sudden changes in soil moisture may damage or kill plant roots which can lead to yellowed leaves as the roots are unable to take up sufficient moisture. Most otherwise healthy plants, however, are able to grow new roots as they readjust. Maintain correct soil moisture or move the plants to a more favorable environment.
  • Mineral Deficiency – A shortage of some key mineral nutrients will cause chlorosis in plants. Often, a yellow leaf indicates a lack of nitrogen, however, magnesium, iron, sulfur or manganese deficiencies are indicated by yellowing leaves with prominent green veins. A magnesium deficiency will manifest itself in the yellowing of older leaves. On the other hand, an iron deficiency presents itself in the yellowing of new or young leaves. A simple soil analysis will let you know what minerals or trace elements your soil is deficient in.
  • Soil Factors – Although essential and trace elements may be present in the soil, many other factors affect how the plant uses and absorbs them. If the soil pH is too high/low or there is too much salt in the soil, the plant will not be able to utilize the available nutrients. Test your soil pH and adjust as necessary to be sure the plant can absorb nutrients appropriately to maintain proper foliage colors.
  • Toxins – Although this doesn’t happen frequently, pollutants like paint, oil, chemical solvents, airborne herbicides or pesticides or other pollutants may cause leaves to turn yellow and dark brown before dying. In this case, remove and dispose of the plant and its surrounding soil, and mark the area to be sure it can be treated appropriately and no other plants are inadvertently exposed to the toxins.

It can be alarming to see healthy plants suddenly yellowing, but by understanding chlorosis and how it happens, you can take steps to determine the cause of the color change and what to do to help your plants recover.

bug_1

Planting Basics – Trees & Shrubs

Are you ready to add trees and shrubs to your landscape? You don’t necessarily need to hire professionals to do the planting when you learn the basics of doing it the right way yourself.

Soil Preparation

Minimizing planting stress is the goal of proper planting. This will affect how quickly and how well trees become established once they are planted. Trees and shrubs should also be thoroughly watered prior to planting to minimize water stress.

Ideally, soil preparation should be carried out well ahead of planting. Preparation could include incorporating organic matter into the soil to improve aeration. This will assist drainage of compacted soils and improve soil nutrient-holding capacity. Specific preparation may be needed if the soil has an inappropriate pH or is lacking in certain elements. Trees and shrubs with a limited soil tolerance range may require very specific soil preparation to meet their requirements.

Additional soil preparation is essential when you are ready to plant trees and shrubs. Dig the planting hole only as deep as the root ball, and 50 percent wider than the root ball. Prepare the soil by mixing

  • 33% topsoil 
  • 33% organic matter 
  • 33% of existing soil

Planting Container-Grown Trees & Shrubs

When you buy a plant from a garden center or nursery, it often comes in a small pot that holds the roots. Remove the plant from that container gently. Don’t pull on delicate stems or foliage. Squeezing the container all around can help loosen the root ball so it slides out more easily. Or cut away the container if it is thin enough.

Because the plant was grown in a container, its roots have been restricted by the shape of the container. Loosen the roots all the way around, even on the bottom. The root system might be too tight to loosen with your fingers. So cut through the roots slightly with a knife or pruning sheers. Make three or four one-inch deep cuts, then gently pull the roots apart.

Center the plant in the prepared hole, keeping it 1-3 inches above grade. Keep roots spread out.

Planting Field-Grown Trees and Shrubs

If you are transplanting a tree or shrub that has been field-grown, it may have bare roots or be lightly bagged or in a burlap sack. Center the plant in the prepared hole 1-3 inches above the grade. Cut and remove all cords or twine from the root ball and trunk. The burlap sack should be left on but loosened and pulled away from the trunk and below the soil surface. 

Remember to move trees carefully. Roll the root ball on its side and “steer” it into the hole with the trunk. Straighten the tree upright in the hole, checking it from different angles to be sure it is fully upright.

Completing the Planting

For both container-grown and balled and burlap-sacked plant material, backfill the planting hole with soil your mix and pack firmly. Be sure to make a rim of soil around the plant to act as a “saucer” for holding water.

Water thoroughly with a slow soaking. Use a root stimulator fertilizer to provide a good initial stimulus for the roots to spread out.

Apply a 2-inch layer of mulch around your new planting. Be sure to keep an open space of 3 inches around the trunk or base of the plant to allow for air circulation.

Staking Container Grown & Field Grown Trees and Shrubs

When larger trees or shrubs are planted, they are not yet firmly established in their new locations, which means they may tip or lean as the soil settles. For larger trees, use three wires secured to anchor stakes in firm ground (never into the root ball). Where the wires touch the tree, they should be covered with a rubber hose to prevent damage. Remove stakes as soon as roots become established. This can be as soon as a few months, so check your tree frequently. Stakes should not be left in place any longer than one growing season.

New Plant Care

All newly planted trees and shrubs need gentle care as they settle into their new locations. To keep them healthy and encourage good initial growth…

  • Water Properly
    Plants should be slowly soaked to a depth of 4 inches, which is about an inch of water per week. This is necessary during the first year or two. Let the hose run slowly at the base of the plant until the water has penetrated the root depth. Too much water can also be a problem. Feel the soil. If it is soggy or squishy, do not add water. Frequent light watering is not as good as a thorough soaking once per week. This encourages strong root growth.
  • Fertilize Appropriately
    Your new plants should be given a Root Stimulator type fertilizer right after planting. You should not use a fertilizer meant for mature plants on new material. It could cause damage to your plant. A healthy root system is essential for new plants – top growth will follow. After the first season, regular fertilizers can be used.
  • Prune Safely
    Pruning at planting time may be necessary for larger trees to reduce leaf surface to match cut roots. Remove one-third of the smaller twigs. Do not cut back the main trunk or larger branches. If shaping is necessary, trim side branches enough to get uniformity.
  • Be Alert for Insects and Diseases
    Keep an eye out for holes, brown leaves, or brown needles. This could be a sign of insect or disease problems. Ask our staff for help identifying the insect or disease and to prescribe appropriate treatments.
  • Special Care Plants
    Some plants need extra special care because of their finicky needs. For example, azaleas, hollies, rhododendrons, and dogwoods all need well-drained, acidic soils, high in organic matter and a shady location. Research the trees and shrubs you are planting to be sure you are meeting their needs right from the beginning.

It can seem intimidating to plant your own trees and shrubs since they are an investment in your landscape that you hope to enjoy for many years. By understanding planting basics, however, you can easily give every plant a great start in its new home.

Time to PlantTime to Plant

Time to Plant

Time to Plant

Jump Start Your Pond

Are you ready to get your pond started up for another beautiful spring and summer? It can be a big job to rejuvenate such a large water feature so it remains balanced and healthy after a long, harsh winter, but with a few careful steps, your pond can be back in shape in no time.

When to Reopen Your Pond

It is important that you don’t try to get your pond started too early in the season. All risk of hard freezes should be long past, and even nightly frosts should be tapering off or already finished before you restart your pond. The exact time will vary based on your pond’s size, depth and location, as well as your ambient weather conditions and the pond’s overall ecology. For example, a smaller, shallower pond in a sunny area will be warmed up and ready to restart before a larger, deeper pond in a shady spot. It can be helpful to keep a journal or calendar from year to year to note when you reopened your pond and how successful your efforts were. In time, you’ll be able to adjust your calendar easily without risking the health and wellness of your pond, even if annual conditions change.

Easy Steps to Restart Your Pond

When you are ready to jump start your pond…

  • Remove the netting that was set in place last fall. If needed, clean and make repairs to the netting right away so it will be ready to use next fall. Store it safely where it will be easy to reach when needed again.
  • Remove excess sediment from the bottom of the pond with a vacuum or a net. It is not necessary to remove every bit of sediment, but most of the debris should be removed so the pump can function effectively.
  • Test last year’s pump and replace if necessary. Be sure to test any additional moving or electrical features, such as waterfalls, fountains or lighting around the pond so repairs can be made if needed.
  • If water level is low, add fresh water to desired height. Avoid overfilling the pond, however, which can disrupt the essential chemical and microbial balance that keeps the pond healthy.
  • Add de-chlorinator as necessary to remove heavy chemicals from the water that has been freshly added to the pond. As with any chemical treatments, be sure to test the water several times to be sure you reach the proper balance.
  • Place aquatic plants in the pond and begin fertilizing to meet their nutritional needs. These may be plants that you’ve overwintered in a safe location, or you may choose to add new or exotic plants in late spring.
  • Begin feeding fish when water temperature stays above 55 degrees. Keep feedings minimal at first as fish come out of dormancy, as excess food will only rot and lead to greater bacteria and algae growth in the water.

It is perfectly natural for your pond water to turn green at first, but with the proper plants it should balance itself out in no time. It may take a few days or even a couple of weeks for your pond to return to its healthy, active state, but if you’re restarted it properly, you shouldn’t have any major problems.

pond